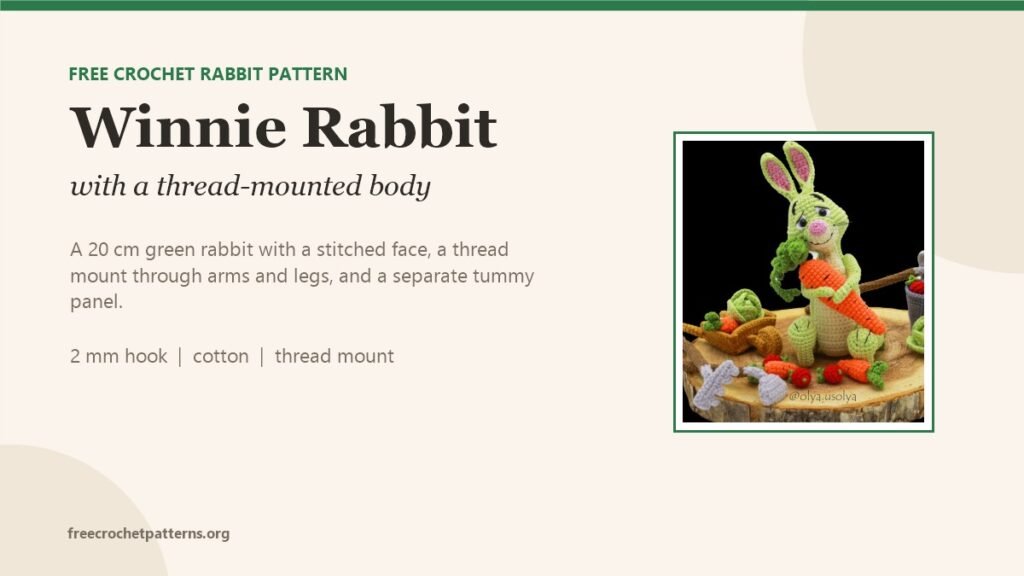
Winnie is a green rabbit worked in semi-cotton yarn on a 2 mm hook, about 20 cm tall. The head and body are a single piece crocheted from the top down: the head closes to 18 stitches at the neck and the body opens out again from there, so there is no seam between them and no neck to sew.
Two details do most of the work on the finished toy. The eye whites are crocheted first and inserted into the head as it is built, sitting around the safety eyes; and the arms and legs are attached with a thread mount — one long needle through the body, then tied inside — instead of being sewn flat. The mount is what lets the limbs sit at any angle.
The tummy is a separate flat panel, and the ears are two-layer pieces finished with a folded edge. Every round is written out below.

What you need
- Yarn: semi-cotton (YarnArt Jeans, Alize Cotton Gold, Gazzal Jeans) in green for the main shade, ivory for the muzzle, tummy and tail, pink for the nose and inner ears, white for the eye whites and black for the eyebrows
- Hook: 2 mm — finished height about 20 cm with 5–6 mm eyes
- Eyes: a pair of safety eyes, 5–6 mm
- Notions: thin black thread for the face, thin black sewing thread for the whiskers, synthetic or tooth thread for the mount, stitch markers, pins, fibre fill
The same toy also works in plush yarn: Himalaya Dolphin Baby or YarnArt Dolce on a 3.5 mm hook with 10–12 mm eyes gives a 37 cm rabbit.
Abbreviations
- MR magic ring, CH chain, SS slip stitch, St stitch, SC single crochet
- BPSC back post single crochet, INC increase, DEC decrease
- BLO back loops only, FLO front loops only
- (SC, INC)*6 (18) repeat the bracketed sequence six times; the number in brackets is the total for the round
Eye whites (make 2)
White yarn. These are crocheted first so they can be inserted with the eyes while the head is open — felt pieces work too.
- 0. ch 4
- 1. from the second chain: 2 SC, 4 SC into the last chain, then on the other side 2 SC (7)
Join the oval with a straight line or a SS, fix the thread and leave a long end for sewing, withdrawing it to the wrong side. Insert the eyes in the lower side of the oval so they sit shifted towards the centre, and leave the plug off the back of the eye.
Head and body
Green yarn, one piece, stuffed as you go.
- R1: 6 SC in MR
- R2: 6 INC
- R3: (SC, INC)*6 (18)
- R4: (2 SC, INC)*6 (24)
- R5: 24 SC
- R6: (3 SC, INC)*6 (30)
- R7: (4 SC, INC)*6 (36)
- R8–9: 2 rounds of 36 SC
At round 10, mark the beginning of the round with a stitch marker and keep it: that point is the middle of the back of the head, and the start of the round will be aligned to it at the points noted below so the pattern of increases and decreases lines up. If your round start drifts to the right, work extra shifting stitches that are not counted in the total and move the marker to the left.
- R10: 5 SC, (SC, INC)*4, 9 SC, (SC, INC)*4, 6 SC (44)
- R11: 5 SC, (2 SC, INC)*4, 10 SC, (INC, 2 SC)*4, 5 SC (52)
- R12–14: 3 rounds of 52 SC
At this stage insert the eyes between rounds 9 and 10, 6 SC apart, and fix the plug on the wrong side. Sew the eye whites on with the left end of the thread: the upper edge of the white should sit 3 rounds above the pupil, the lower edge a round below, and the two whites 4 SC apart. Shift the marker back to the middle of the back if needed.
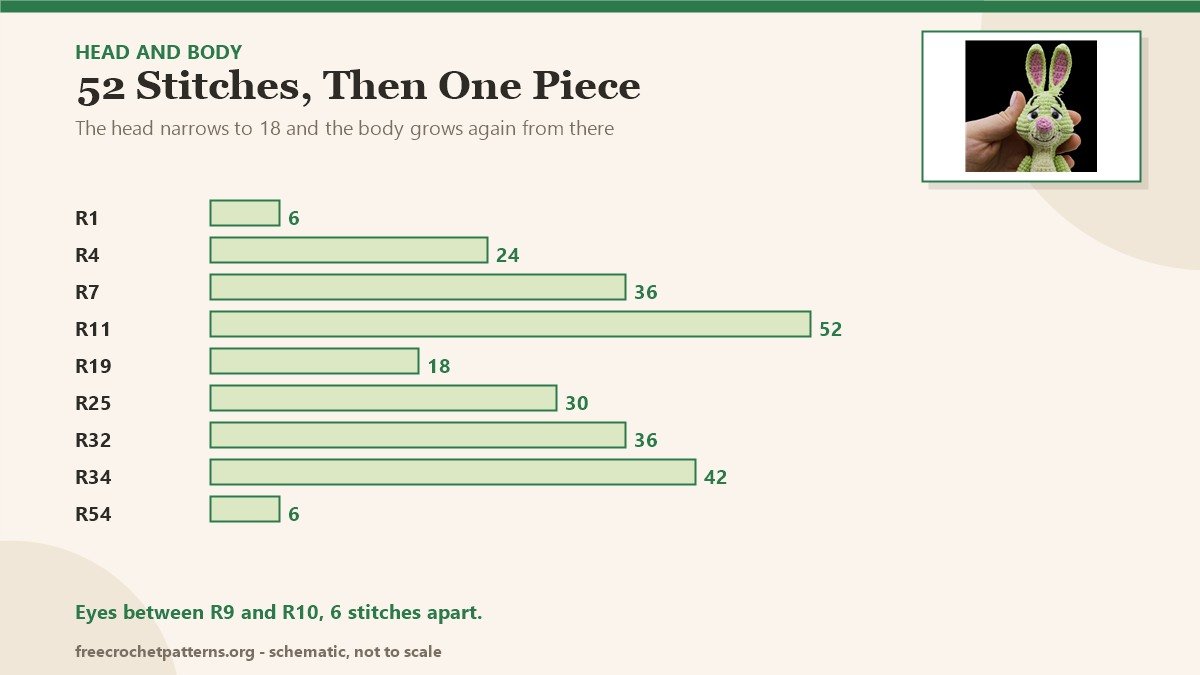
- R15: 5 SC, (2 SC, DEC)*4, 10 SC, (DEC, 2 SC)*4, 5 SC (44)
- R16: 5 SC, (SC, DEC)*4, 9 SC, (SC, DEC)*4, 6 SC (36)
- R17: (4 SC, DEC)*6 (30)
- R18: (3 SC, DEC)*6 (24)
- R19: (2 SC, DEC)*6 (18)
Watch the shape here: the head should be well stuffed at the sides for the cheeks and slightly flat at the front and back, giving a soft triangle. Then continue straight into the body.
- R20–22: 3 rounds of 18 SC
- R23: (5 SC, INC)*3 (21)
- R24: (6 SC, INC)*3 (24)
- R25: 6 SC, (SC, INC)*6, 6 SC (30)
- R26–29: 4 rounds of 30 SC
- R30: 2 SC, (SC, INC)*2, (2 SC, DEC)*4, SC, (SC, INC)*2, 3 SC (30)
- R31: 30 SC
- R32: 3 SC, (2 SC, INC)*3, 6 SC, (INC, 2 SC)*3, 3 SC (36)
- R33: 36 SC
- R34: 3 SC, (3 SC, INC)*3, 6 SC, (INC, 3 SC)*3, 3 SC (42)
- R35–48: 14 rounds of 42 SC
- R49: (5 SC, DEC)*6 (36)
- R50: (4 SC, DEC)*6 (30)
- R51: (3 SC, DEC)*6 (24)
- R52: (2 SC, DEC)*6 (18)
- R53: (SC, DEC)*6 (12)
- R54: 6 DEC
Tighten the hole, fix the thread and hide the end inside the body.
Muzzle
Start with ivory yarn.
- R1: 8 SC in MR
- R2: (SC, 3 SC in the same St)*4 (16)
- R3: 10 SC, 3 SC in the same St, 3 INC, 3 SC in the same St, SC (23)
- R4: change to green, 10 SC, change to ivory, 13 SC (23)
- R5: 10 SC, change to ivory, fix the green and leave a long end to sew, 12 SC, SS (23)
Fix the thread and leave a long end for sewing.
Nose
Pink yarn, not stuffed.
- 0. ch 4
- 1. from the second chain: 2 SC, 3 SC into the last chain, then on the other side 3 SC in the same St, INC (10)
- 2. BLO, 10 SC
- 3. 10 SC
Finish with a straight line and leave a long end. Sew the nose on the muzzle above the magic ring, stuff the muzzle a little and sew it on in the area of rounds 10 to 17.
Face
- Embroider the eyelids with green thread — the angle of the eyelid decides the expression.
- Embroider the lower edge of the eyelid with thin black thread.
- Embroider the smile with thin black thread and fix the curve at the two lower points with stitches.
- Embroider the whiskers with thin black thread.
- Embroider the eyebrows with black thread several times in the area of rounds 4 to 6 so they come out thick.
Ears (make 2)
Inner part, pink yarn, worked in turning rows with a turning chain at the end of each row.
- 0. ch 2
- 1. in the second chain from the hook: INC (2)
- 2. 2 SC
- 3. INC, SC (3)
- 4. 3 SC
- 5. INC, 2 SC (4)
- 6–14: 9 rows of 4 SC
Fix and cut the thread, hiding the initial and end threads along one side between the loops.
Outer part, green yarn, same shape: ch 2, INC (2), 2 SC, INC and SC (3), 3 SC, INC and 2 SC (4), then rows 6 to 14 of 4 SC. Do not cut the thread.
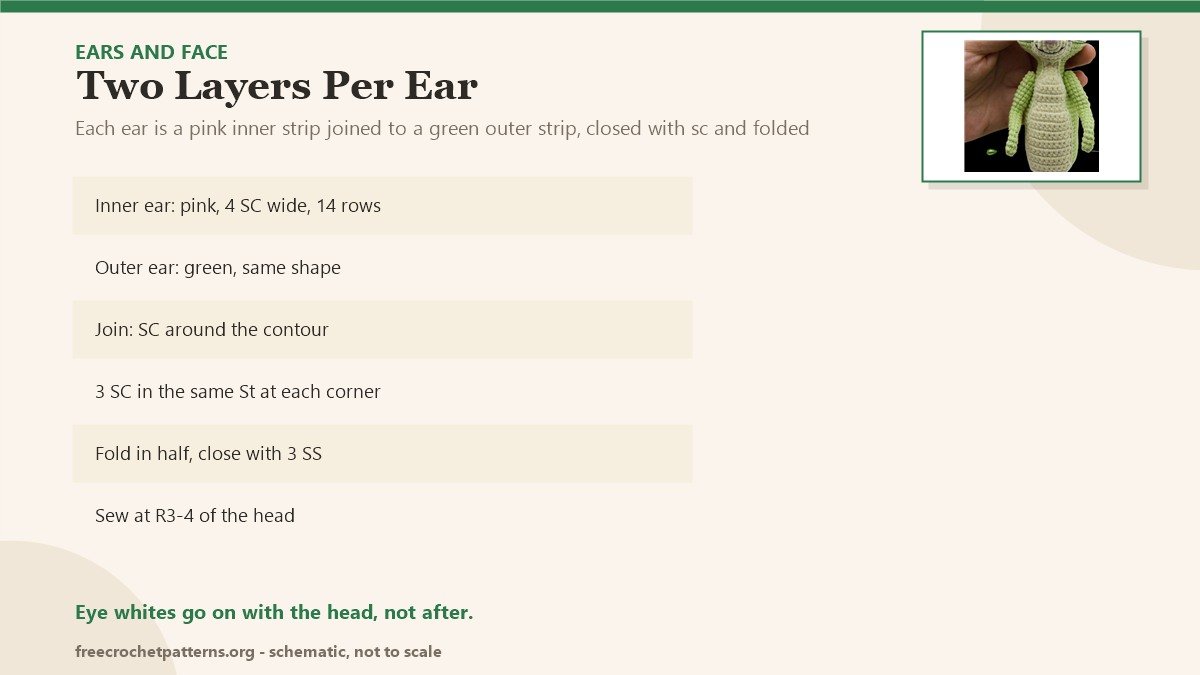
Work a chain, place the pink inner part inside with its threads hidden, and crochet the two pieces together with SC around the contour, working 3 SC into the same stitch at each corner. Work a chain, fold the piece in half and close both sides with 3 SS. Fix the thread, leave a long end and withdraw it to the base of the ear. Sew the ears at rounds 3–4 on top of the head — the exact position can be adjusted.
Hair
Fix a piece of green thread at the top of the head with a knot, separate the threads and trim them. If you are working in plush yarn, use several loop stitches instead, or knot cotton thread of a matching colour.
Tummy
Ivory yarn, in turning rows with a turning chain at the end of each row.
- 0. ch 3
- 1. in the second chain from the hook: 2 SC
- 2–4: 3 rows of 2 SC
- 5. 2 INC (4)
- 6. INC, 2 SC, INC (6)
- 7. INC, 4 SC, INC (8)
- 8–9: 2 rows of 8 SC
- 10. skip a St, 5 SC, DEC (6)
- 11. 6 SC
- 12. INC, 4 SC, INC (8)
- 13. INC, 6 SC, INC (10)
- 14–27: 14 rows of 10 SC
- 28. skip a St, 7 SC, DEC (8)
- 29. skip a St, 5 SC, DEC (6)
- 30. skip a St, 3 SC, DEC (4)
Work a chain and crochet the piece with SC around the contour, 3 SC in the same stitch at the upper corners. Finish with a straight line and leave a long end. Sew it on so the upper edge of the tummy meets the muzzle.
Arms (make 2)
Green yarn. Stuff only the upper part, as far as the elbow.
- R1: 6 SC in MR
- R2–4: 3 rounds of 6 SC
- R5: DEC, 4 SC (5)
- R6: INC, 4 SC (6)
- R7: INC, 5 SC (7)
- R8–12: 5 rounds of 7 SC
- R13: 3 SC, 2 INC, 2 SC (9)
- R14–20: 7 rounds of 9 SC
- R21: 4 DEC, stopping short of the end (5)
The 2 INC of round 13 must sit on the opposite side from the DEC of round 5, because together they form the bend of the arm — shift them if needed. Tighten the hole and hide the end inside.
Hips (make 2)
Stuff at the end so the piece stays flat.
- 0. ch 7
- 1. from the second chain: 5 SC, 5 SC into the last chain, then on the other side 4 SC, INC (16)
- 2. INC, 4 SC, 5 INC, 4 SC, 2 INC (24)
- 3. SC, INC, 4 SC, (SC, INC)*5, 4 SC, (SC, INC)*2 (32)
- 4. 2 SC, INC, 4 SC, (2 SC, INC)*5, 4 SC, (2 SC, INC)*2 (40)
- 5. 3 SC, INC, 4 SC, (3 SC, INC)*5, 4 SC, (3 SC, INC)*2 (48)
- 6. 48 SC
- 7. 3 SC, DEC, 4 SC, (3 SC, DEC)*5, 4 SC, (3 SC, DEC)*2 (40)
- 8. 2 SC, DEC, 4 SC, (2 SC, DEC)*5, 4 SC, (2 SC, DEC)*2 (32)
- 9. SC, DEC, 4 SC, (SC, DEC)*5, 4 SC, (SC, DEC)*2 (24)
- 10. DEC, 4 SC, 5 DEC, 4 SC, 2 DEC (16)
Fix the thread, leave a long end, tighten the hole along a straight line and hide the thread inside.
Feet (make 2)
Stuffed as you go, keeping the piece flat.
- R1: 6 SC in MR
- R2: 6 INC (12)
- R3: (3 SC, 3 INC)*2 (18)
- R4: 3 SC, (SC, INC)*3, 3 SC, (SC, INC)*3 (24)
- R5: 5 SC, (SC, DEC)*5, 4 SC (19)
- R6: 19 SC
- R7: 5 SC, 5 DEC, 4 SC (14)
- R8: 14 SC
- R9: 2 SC, 4 DEC, 4 SC (10)
- R10–13: 4 rounds of 10 SC
- R14: 5 DEC (5)
Tighten the hole, leave a long end and withdraw it from above, between rounds 9 and 10 — the top of the piece is where the decreases are. Embroider two lines with thin black thread, pulling slightly, to mark the fingers, then sew the feet on the hips.
Assembly
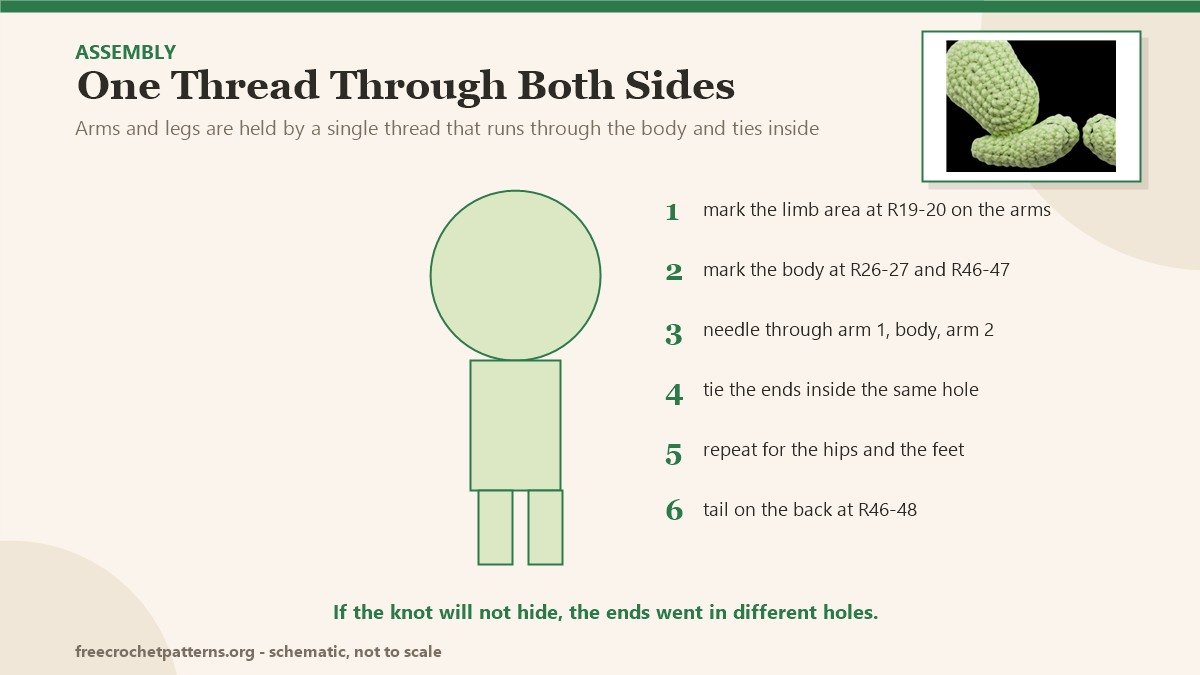
Mark the attachment areas before you thread the needle.
- Arms: between rounds 19 and 20, on the left and right arm respectively.
- Hips: on the side of the hole tightening, left and right leg respectively.
- Body, above: between rounds 26 and 27 on the sides.
- Body, below: between rounds 46 and 47 on the sides.
Insert a long needle through the body at the mounting point of the first arm and bring it out at the mounting point of the second. Put the first arm on the needle taking only the front part of the fabric — 2 to 3 SC plus the fibre fill, not through the whole piece — then turn back through the same hole to the initial thread end and put the second arm on. Pull the arms very well and tie the thread ends, hiding them inside the body through the same initial hole so the knot can disappear. If the knot will not hide, the ends went in through different holes: redo the mount.
Mount the legs the same way.
Tail
Ivory yarn, stuffed lightly.
- R1: 6 SC in MR
- R2: 6 INC (12)
- R3: (SC, INC)*6 (18)
- R4–6: 3 rounds of 18 SC
- R7: (SC, DEC)*6 (12)
- R8: 6 DEC (6)
Tighten the hole, leave a long end and sew it on the back of the body at rounds 46–48.
Pattern: “Winnie Rabbit” by Olya Usolya, pages 1 to 27. Photography and instructions reproduced on freecrochetpatterns.org with the designer’s permission. The vegetables, wheelbarrow and garden tools that follow in the original document are not included here.
1 comment