
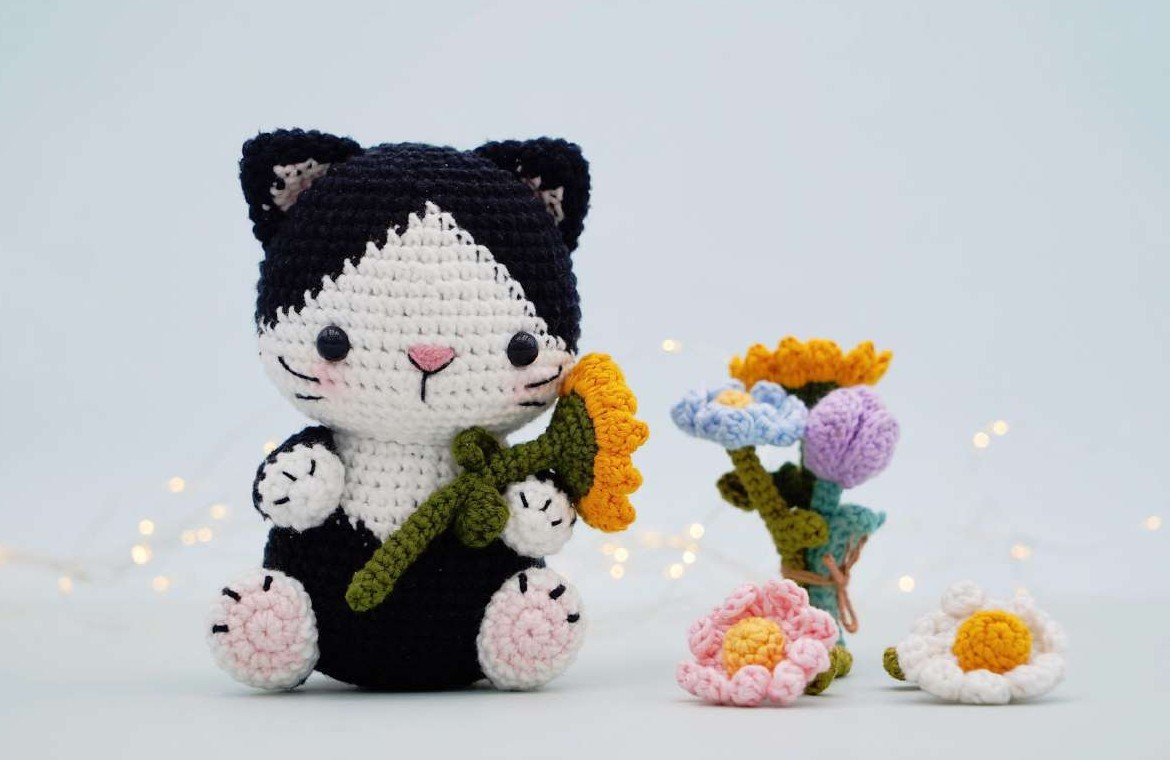
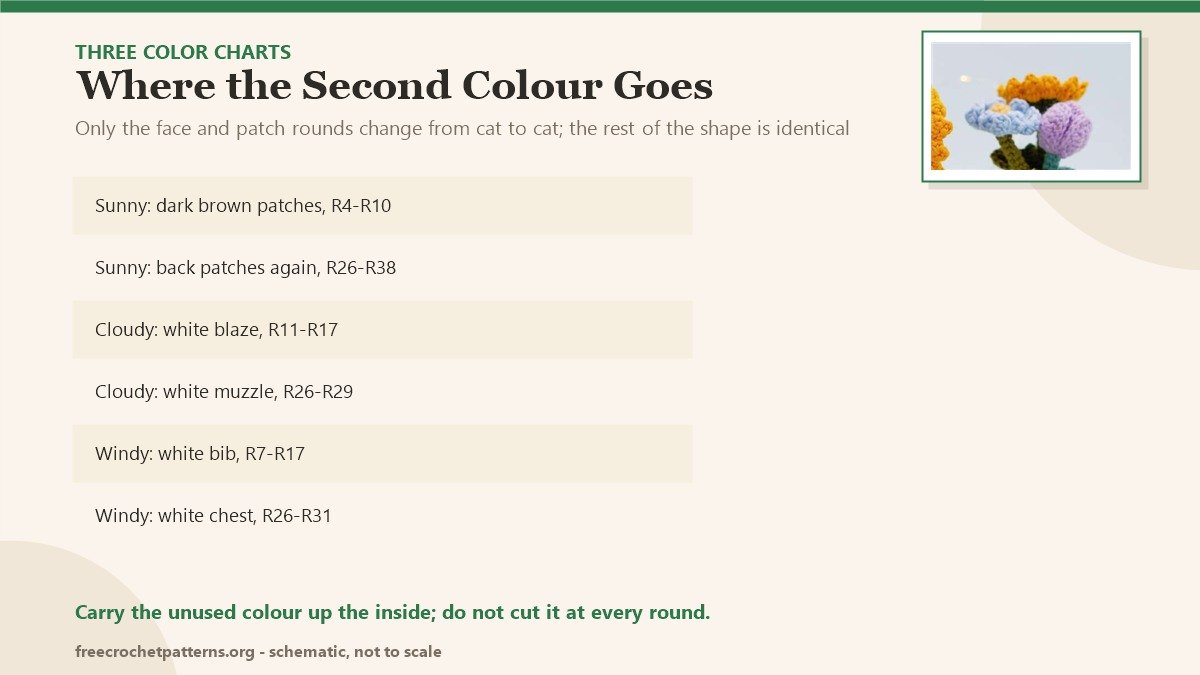
Three kittens, one body. Sunny, Cloudy and Windy are 14 cm tall, worked in DK on a 2.5 mm hook, and the head and body are a single piece — no seam at the neck. What changes from cat to cat is where the second colour goes: brown tabby patches, a white blaze down a grey face, a black cat with a white bib.
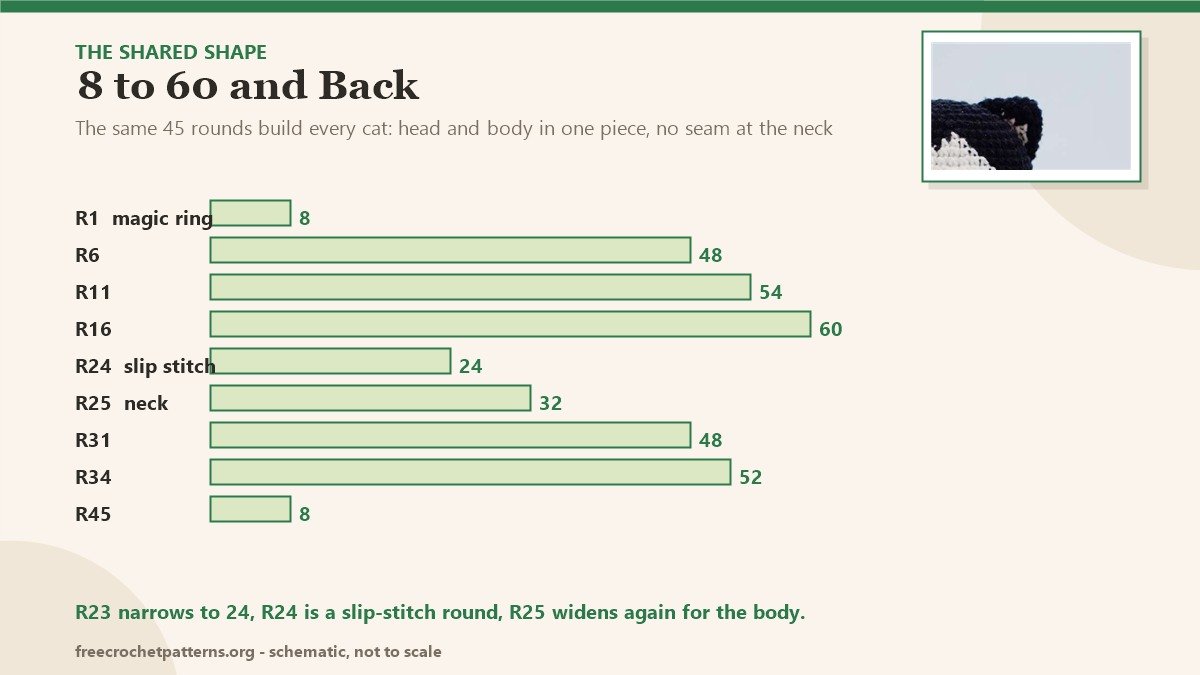
The reason it is worth publishing all three together is that the shape is genuinely shared. Rounds 1 to 45 are the same increase and decrease plan every time, so once you have crocheted one kitten you can crochet the other two from the colour charts alone. Below I have written all three out in full anyway, round by round, so you can start with whichever cat you want and never have to cross-reference two sets of numbers.
Two structural details do the character work. R23 narrows to 24 stitches and R24 is a round of slip stitches — that is the neck crease, and it is why the head sits up instead of slumping into the body. R25 widens straight back out to 32 for the shoulders. Then the legs: they start as a flat 16-stitch disc, so the paw is wide and the leg narrows above it, which is what lets a 14 cm cat stand.
What you need
- Yarn: DK, about 110 m per 50 g — brown and dark brown for Sunny, grey and white for Cloudy, black and white plus a scrap of pink for Windy
- Hook: 2.5 mm
- Eyes: two 8 mm safety eyes per cat
- Notions: black embroidery thread, fibre fill, yarn needle, pins, pink blusher
Abbreviations
MR magic ring, sc single crochet, inc increase, dec decrease, slst slip stitch, ch chain, st stitch. US terms.
Work in a spiral throughout. The count in brackets at the end of each round is the total number of stitches you should have.
Sunny Kitty
Head and body (start in brown)
- R1: 8 sc in MR (8)
- R2: inc in each stitch (16)
- R3: (inc, sc) ×8 (24)
- R4: 3× (2 sc, inc); 3× (2 sc brown, inc dark brown); 2× (2 sc, inc) brown (32)
- R5: 3× (3 sc, inc); 3× (2 sc brown, 1 sc + inc dark brown); 2× (3 sc, inc) brown (40)
- R6: sc, inc, 3× (4 sc, inc); 3× (3 sc dark brown, 1 sc + inc brown); 4 sc, inc, 3 sc (48)
- R7–8: 21 sc; 3× (3 sc dark brown, 3 sc brown); 9 sc — 2 rounds (48)
- R9: 22 sc; 1 sc dark brown; 4 sc brown; 3 sc dark brown; 4 sc brown; 1 sc dark brown; 13 sc brown (48)
- R10: 28 sc; 1 sc dark brown; 19 sc brown (48)
Cut the dark brown here and carry on in brown only.
- R11: 6× (7 sc, inc) (54)
- R12–15: 54 sc — 4 rounds
- R16: 6× (8 sc, inc) (60)
- R17: 60 sc
Insert the eyes between R15 and R16, 8 stitches apart, centred on the face. Start stuffing the head firmly and keep adding as you go.
- R18: 6× (8 sc, dec) (54)
- R19: 3 sc, dec, 5× (7 sc, dec), 4 sc (48)
- R20: 6× (6 sc, dec) (42)
- R21: 2 sc, dec, 5× (5 sc, dec), 3 sc (36)
- R22: 6× (4 sc, dec) (30)
- R23: sc, dec, 5× (3 sc, dec), 2 sc (24)
- R24: slst in each stitch (24)
- R25: 8× (2 sc, inc) (32)
- R26: 28 sc brown; 4 sc dark brown (32)
- R27: 13 sc brown; 15 sc brown; 4 sc dark brown (32)
- R28: 3× (3 sc, inc), 1 sc; 2 sc + inc brown; 4× (3 sc, inc); 3 sc (40)
- R29–30: 40 sc — 2 rounds
- R31: 6× (4 sc, inc), 4 sc; inc + 4 sc + inc dark brown (48)
- R32: 21 sc; 19 sc brown; 8 sc dark brown (48)
- R33: 21 sc; 27 sc brown (48)
- R34: 4× (11 sc, inc) (52)
- R35: 52 sc
- R36: 44 sc; 8 sc dark brown (52)
- R37: 21 sc; 23 sc brown; 8 sc dark brown (52)
- R38: 21 sc; 31 sc brown (52)
Cut the dark brown, finish in brown.
- R39: 4× (11 sc, dec) (48)
- R40: 48 sc
- R41: 8× (4 sc, dec) (40)
- R42: sc, dec, 7× (3 sc, dec), 2 sc (32)
- R43: 8× (2 sc, dec) (24)
- R44: 8× (sc, dec) (16)
- R45: dec ×8 (8)
Finish stuffing, close the last 8 stitches and weave in. Embroider the nose between the eyes, whiskers under each eye and a short eyebrow above each. Blush the cheeks and the nose.
Arms (make 2, brown)
- R1: 8 sc in MR (8)
- R2: 4× (inc, sc) (12)
- R3–8: 12 sc — 6 rounds
Stuff lightly. Flatten the opening and work 6 sc through both layers to close it. Leave a long tail. Embroider three straight lines for claws at R2 of each arm.
Legs (make 2, start in dark brown)
- R1: 8 sc in MR (8)
- R2: inc in each stitch (16)
Change to brown at the end of R2.
- R3: sc, inc, 5 sc, 2 inc, 5 sc, inc, sc (20)
- R4: 20 sc
- R5: 6 sc, 4 dec, 6 sc (16)
- R6: 2× (4 sc, dec), 4 sc (14)
- R7: 6 sc, dec, 6 sc (13)
- R8: 6 sc, inc, 6 sc (14)
Stuff lightly, flatten and close with 7 sc through both layers. Embroider the claws at R3.
Ears (make 2, start in brown)
- R1: 6 sc in MR (6)
- R2: 3× (inc, sc) (9)
- R3: inc, 2 sc, inc; 1 sc dark brown; inc, 2 sc brown (12)
- R4: 5 sc; 3 sc dark brown; 4 sc brown (12)
- R5: 3 sc, inc, sc; 2 sc + inc dark brown; 3 sc + inc brown (15)
- R6: 4 sc, inc, sc; 3 sc + inc dark brown; 4 sc + inc brown (18)
Fasten off, leaving a long tail.
Tail (start in dark brown)
- R1: 6 sc in MR (6)
- R2: 3× (inc, sc) (9)
- R3–6: 9 sc — 4 rounds
Change to brown at the end of R6 and start stuffing, adding more as you go.
- R7–26: 9 sc — 20 rounds
Flatten and close with 4 sc through both layers.
Assembly
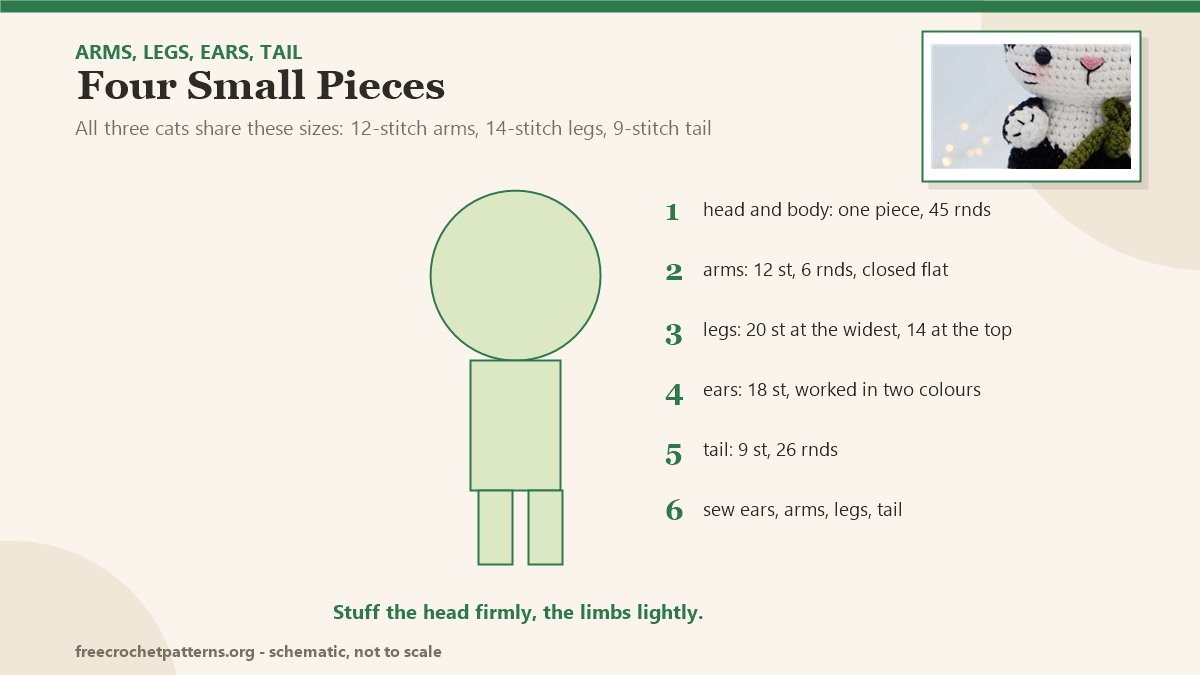
Place the ears on either side of the head, between R3 and R10, and sew them on. Sew the arms to the sides of the body just below the head. Sew the legs on either side of the body. Sew the tail to the centre back at the base of the body and tack a few rounds of it to the body so it hangs instead of sticking out.
Cloudy Kitty
Head and body (start in grey)
- R1: 8 sc in MR (8)
- R2: inc in each stitch (16)
- R3: (inc, sc) ×8 (24)
- R4: 8× (2 sc, inc) (32)
- R5: sc, inc, 7× (3 sc, inc), 2 sc (40)
- R6: 8× (4 sc, inc) (48)
- R7–10: 48 sc — 4 rounds
- R11: 2× (7 sc, inc), 7 sc; 1 inc white; 3× (7 sc, inc) grey (54)
- R12–14: 24 sc grey; 4 sc white; 26 sc grey — 3 rounds (54)
- R15: 22 sc; 8 sc white; 24 sc grey (54)
- R16: 2× (8 sc, inc), 2 sc; 6 sc + inc + 5 sc white; 3 sc grey, inc, 2× (8 sc, inc) (60)
Cut the grey and finish the head in white.
- R17: 60 sc
Insert the eyes between R15 and R16, 8 stitches apart, centred. Stuff the head firmly as you go.
- R18: 6× (8 sc, dec) (54)
- R19: 3 sc, dec, 5× (7 sc, dec), 4 sc (48)
- R20: 6× (6 sc, dec) (42)
- R21: 2 sc, dec, 5× (5 sc, dec), 3 sc (36)
- R22: 6× (4 sc, dec) (30)
- R23: sc, dec, 5× (3 sc, dec), 2 sc (24)
- R24: slst in each stitch (24)
- R25: 8× (2 sc, inc) (32)
- R26: 20 sc white; 12 sc grey (32)
- R27: 14 sc white; 4 sc white; 14 sc grey (32)
- R28: 4× (3 sc, inc); 2 sc white; 1 sc + inc grey, 3× (3 sc, inc) (40)
- R29: 21 sc white; 1 sc white; 18 sc grey (40)
Cut the white and carry on in grey.
- R30: 40 sc
- R31: 8× (4 sc, inc) (48)
- R32–33: 48 sc — 2 rounds
- R34: 4× (11 sc, inc) (52)
- R35–38: 52 sc — 4 rounds
- R39: 4× (11 sc, dec) (48)
- R40: 48 sc
- R41: 8× (4 sc, dec) (40)
- R42: sc, dec, 7× (3 sc, dec), 2 sc (32)
- R43: 8× (2 sc, dec) (24)
- R44: 8× (sc, dec) (16)
- R45: dec ×8 (8)
Close, weave in, embroider the nose and whiskers, blush the nose and cheeks.
Arms (make 2, grey)
- R1: 8 sc in MR (8)
- R2: 4× (inc, sc) (12)
- R3–8: 12 sc — 6 rounds
Stuff lightly, flatten, close with 6 sc through both layers, and embroider the claws at R2.
Legs (make 2, start in white)
- R1: 8 sc in MR (8)
- R2: inc in each stitch (16)
- R3: sc, inc, 5 sc, 2 inc, 5 sc, inc, sc (20)
- R4: 20 sc
Change to grey at the end of R4.
- R5: 6 sc, 4 dec, 6 sc (16)
- R6: 2× (4 sc, dec), 4 sc (14)
- R7: 6 sc, dec, 6 sc (13)
- R8: 6 sc, inc, 6 sc (14)
Stuff lightly, flatten, close with 7 sc through both layers.
Ears (make 2, start in grey)
- R1: 6 sc in MR (6)
- R2: 3× (inc, sc) (9)
- R3: inc, 2 sc, inc; 1 sc white; inc, 2 sc grey (12)
- R4: 5 sc; 3 sc white; 4 sc grey (12)
- R5: 3 sc, inc, sc; 2 sc + inc white; 3 sc + inc grey (15)
- R6: 4 sc, inc, sc; 3 sc + inc white; 4 sc + inc grey (18)
Tail (start in white)
- R1: 6 sc in MR (6)
- R2: 3× (inc, sc) (9)
- R3–6: 9 sc — 4 rounds
Change to grey at the end of R6, start stuffing.
- R7–26: 9 sc — 20 rounds
Flatten and close with 4 sc through both layers.
Assembly
Ears between R3 and R10, arms below the head at the sides, legs on either side of the body, tail at the centre back. Tack the tail down along a few rounds.
Windy Kitty
Head and body (start in black)
- R1: 8 sc in MR (8)
- R2: inc in each stitch (16)
- R3: (inc, sc) ×8 (24)
- R4: 8× (2 sc, inc) (32)
- R5: sc, inc, 7× (3 sc, inc), 2 sc (40)
- R6: 8× (4 sc, inc) (48)
- R7: 23 sc; 1 sc white; 24 sc black (48)
- R8: 22 sc; 3 sc white; 23 sc black (48)
- R9: 21 sc; 5 sc white; 22 sc black (48)
- R10: 20 sc; 7 sc white; 21 sc black (48)
- R11: 2× (7 sc, inc), 3 sc; 4 sc + inc + 4 sc white; 3 sc black, inc, 2× (7 sc, inc) (54)
- R12: 20 sc; 12 sc white; 22 sc black (54)
- R13: 19 sc; 14 sc white; 21 sc black (54)
- R14: 17 sc; 17 sc white; 20 sc black (54)
- R15: 15 sc; 21 sc white; 18 sc black (54)
- R16: 8 sc, inc, 4 sc; 4 sc + inc + 2× (8 sc, inc) + 2 sc white; 6 sc black, inc, 8 sc, inc (60)
- R17: 12 sc; 48 sc white (60)
Cut the black and carry on in white.
Insert the eyes between R15 and R16, 8 stitches apart, in the centre of the face. Stuff the head firmly as you go.
- R18: 6× (8 sc, dec) (54)
- R19: 3 sc, dec, 5× (7 sc, dec), 4 sc (48)
- R20: 6× (6 sc, dec) (42)
- R21: 2 sc, dec, 5× (5 sc, dec), 3 sc (36)
- R22: 6× (4 sc, dec) (30)
- R23: sc, dec, 5× (3 sc, dec), 2 sc (24)
- R24: slst in each stitch (24)
- R25: 8× (2 sc, inc) (32)
- R26: 24 sc white; 8 sc black (32)
- R27: 11 sc white; 11 sc white; 10 sc black (32)
- R28: 3× (3 sc, inc); 2× (3 sc, inc) white; 3× (3 sc, inc) black (40)
- R29: 17 sc white; 6 sc white; 17 sc black (40)
- R30: 19 sc white; 2 sc white; 19 sc black (40)
- R31: 4× (4 sc, inc); 1 sc white; 3 sc black, inc, 3× (4 sc, inc) (48)
Cut the white and finish in black.
- R32–33: 48 sc — 2 rounds
- R34: 4× (11 sc, inc) (52)
- R35–38: 52 sc — 4 rounds
- R39: 4× (11 sc, dec) (48)
- R40: 48 sc
- R41: 8× (4 sc, dec) (40)
- R42: sc, dec, 7× (3 sc, dec), 2 sc (32)
- R43: 8× (2 sc, dec) (24)
- R44: 8× (sc, dec) (16)
- R45: dec ×8 (8)
Finish stuffing, close. Embroider the nose in black thread with a little pink yarn, then the whiskers and the eyebrows. Blush the cheeks.
Arms (make 2, start in white)
- R1: 8 sc in MR (8)
- R2: 4× (inc, sc) (12)
- R3: 12 sc
Change to black at the end of R3.
- R4–8: 12 sc — 5 rounds
Stuff lightly, flatten, close with 6 sc through both layers, embroider the claws at R2.
Legs (make 2, start in pink)
- R1: 8 sc in MR (8)
- R2: inc in each stitch (16)
Change to white at the end of R2.
- R3: sc, inc, 5 sc, 2 inc, 5 sc, inc, sc (20)
- R4: 20 sc
- R5: 6 sc, 4 dec, 6 sc (16)
- R6: 2× (4 sc, dec), 4 sc (14)
Change to black at the end of R6.
- R7: 6 sc, dec, 6 sc (13)
- R8: 6 sc, inc, 6 sc (14)
Stuff lightly, flatten, close with 7 sc through both layers, embroider the claws at R3.
Ears (make 2, start in black)
- R1: 6 sc in MR (6)
- R2: 3× (inc, sc) (9)
- R3: inc, 2 sc, inc; 1 sc pink; inc, 2 sc black (12)
- R4: 5 sc; 3 sc pink; 4 sc black (12)
- R5: 3 sc, inc, sc; 2 sc + inc pink; 3 sc + inc black (15)
- R6: 4 sc, inc, sc; 3 sc + inc pink; 4 sc + inc black (18)
Tail (start in white)
- R1: 6 sc in MR (6)
- R2: 3× (inc, sc) (9)
- R3–6: 9 sc — 4 rounds
Change to black at the end of R6 and start stuffing.
- R7–26: 9 sc — 20 rounds
Flatten and close with 4 sc through both layers.
Assembly
Ears between R4 and R10 on this one — the white bib sits lower, so the ears go a round higher than on Sunny. Arms below the head, legs on either side, tail at the centre back, tacked down.
Assembly and finishing
- The neck is the fragile point: R24 is a slip-stitch round, so the yarn tightens there. Do not stuff above it after closing the body, or the head tilts.
- Sew the ears through the head and out again rather than through the outer layer only — a 14 cm cat gets picked up by the ears.
- Arms hang slightly forward of the body’s side seam, about two rounds below the neck crease. Sewn too low they read as legs.
- Change colour in the last stitch of the round, not the first of the next, or the join shows as a diagonal stripe across the face.
Notes
A few colourwork rounds in the original count a stitch or two short of the bracket total — R5 and R28 on Sunny, R16 on Cloudy and Windy. Those brackets are the designer’s own; when a round runs short, spread the plain stitches evenly across the round instead of adding stitches, and you will still land on 40, 48 or 60 at the next increase round.
The eyes go in before the head is closed, between R15 and R16. If you are making these for a child under three, embroider the eyes instead of using safety eyes.
More small animals and toys: Two-in-One Frog is the one that turns inside out, Layla the Llama is the taller one on the same 2.5 mm hook, and Plush Plane is the flat-seamed one. Everything is on the patterns page.
Pattern source: 3 Kittens — Sunny Kitty, Cloudy Kitty and Windy Kitty.
For a larger animal with a garment, Alan the Lion is 30 cm and wears a turquoise t-shirt.
The larger chenille doll is Lily Bunny, 35 cm with a dress worked onto the body.
The opposite approach: Anglerfish SAM is all wire and teeth, where the kittens are one soft body three times.
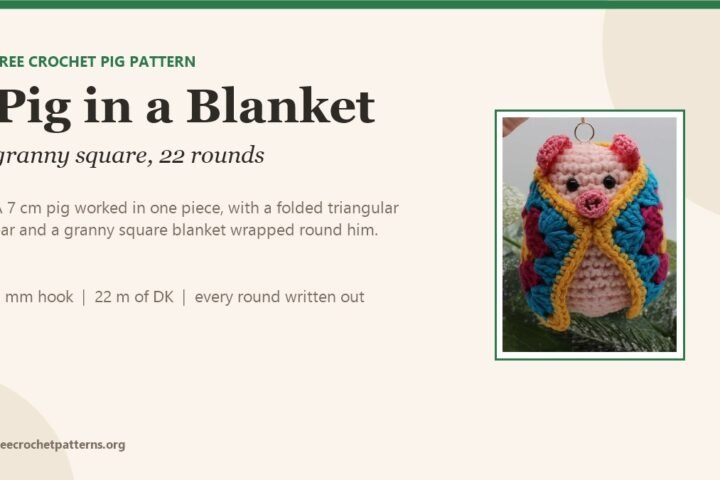
The smallest animal here is Pig in a Granny Square Blanket, a 7 cm pig from 8 g of yarn.
5 comments