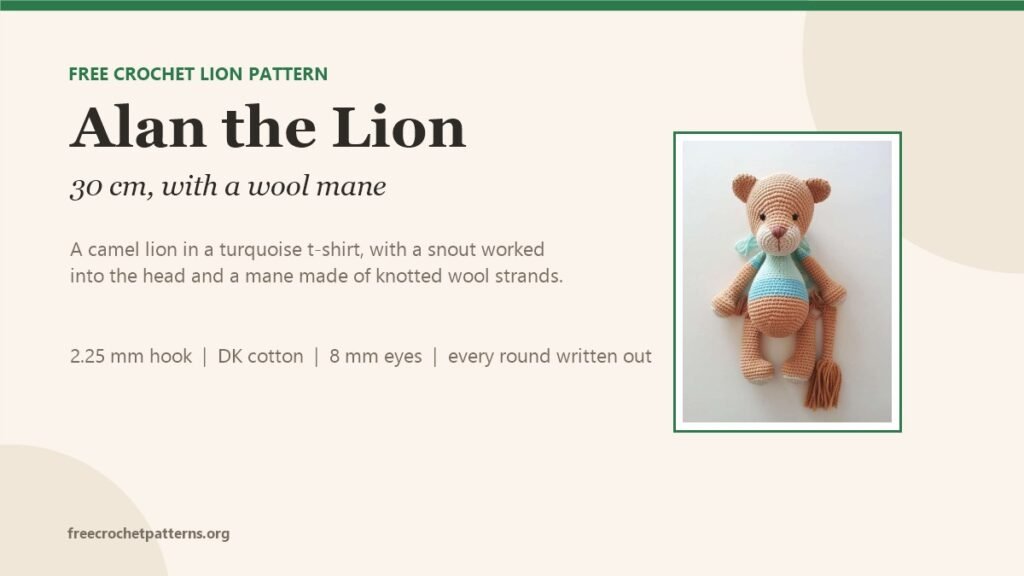
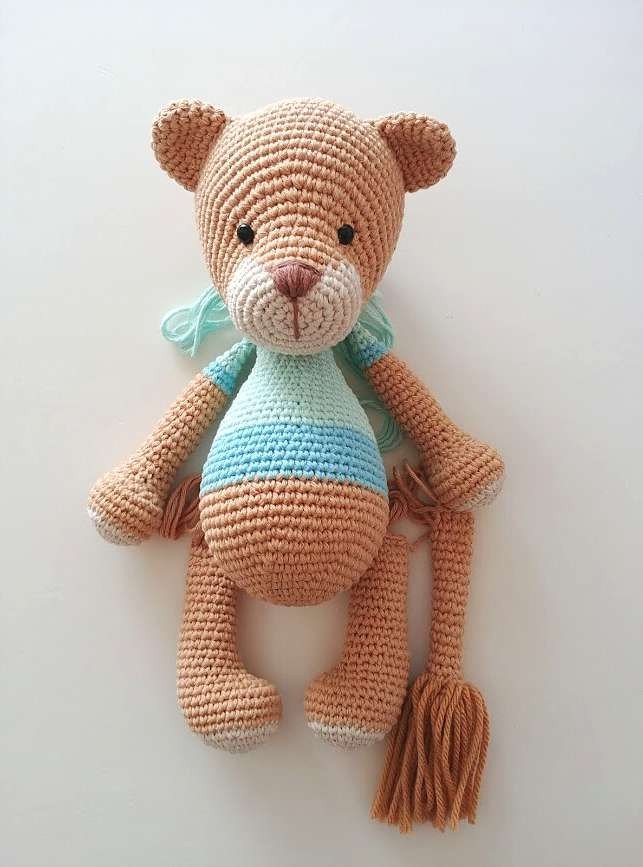
Alan is 30 cm of camel cotton in a turquoise t-shirt, and the thing that makes him look like a lion rather than a bear is not the shape: it is the wool. His mane is not crocheted at all. It is a few hundred 16 cm strips of acrylic wool, knotted through the head with a hook, then cut. The crochet stops at the scalp.
The construction has two other things worth knowing before you start. The snout is worked first, in natural cream, and the camel head grows straight out of it — no sewing, and the colour change happens inside a round rather than at its end, which is why the cream patch ends up centred on the face instead of drifting to one side. And the arms and legs are closed flat with a row of single crochet through both sides at the end, so the paws are a wide flat oval, not a point.
Everything is written out below: the head with its two colours, the body with the t-shirt, the legs, the arms, the tail, and the mane.
What you need
- Yarn: DK cotton, 8/6 — camel and natural for the lion, about 80 g; light turquoise and aquamarine green for the t-shirt
- Mane: acrylic wool such as cashmilon, 4/7, camel, about 60 g
- Hook: 2.25 or 2.5 mm — one or two sizes below the yarn’s recommended hook, worked tightly
- Eyes: 8 or 10 mm safety eyes, or black yarn if you prefer to embroider them
- Notions: brown embroidery thread for the nose and claws, fibre fill, sewing needle, stitch markers, pins, sharp scissors
Finished height about 30 cm. Difficulty: intermediate — not because any round is hard, but because the mane is slow.
Abbreviations
MR magic ring, sc single crochet, slst slip stitch, ch chain, inc increase, dec decrease, R round. US terms. Work in a spiral throughout, and change colour in the last stitch of the round.
The head
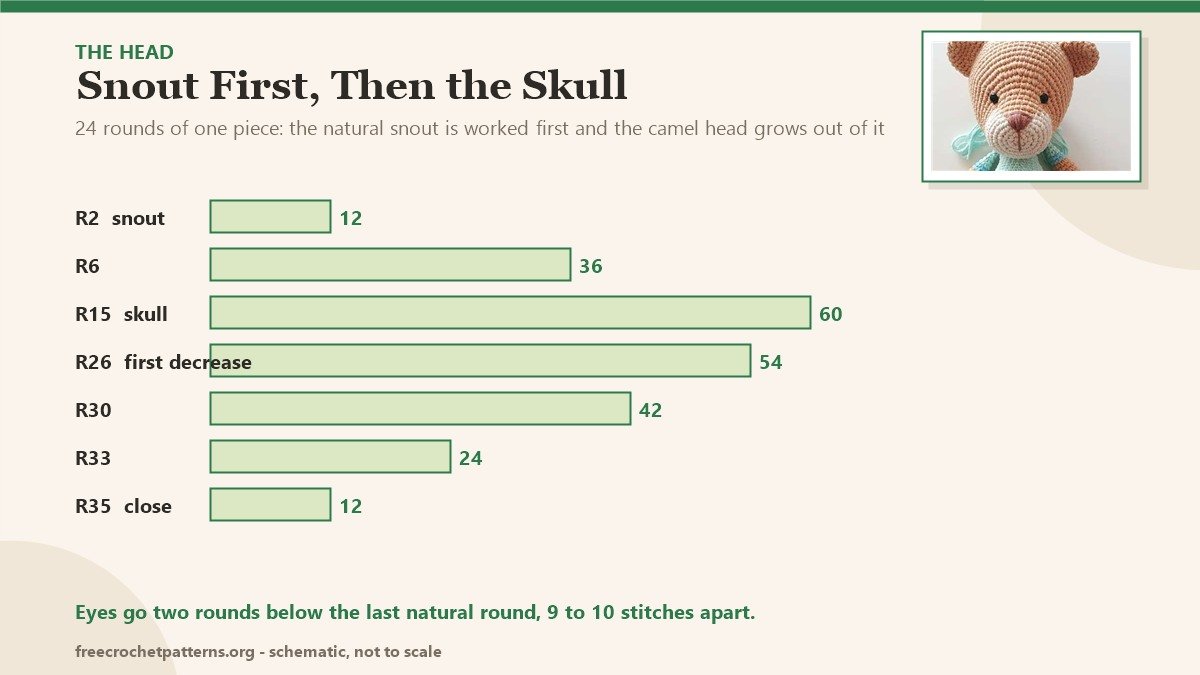
One piece. Start at the tip of the snout in natural, then switch to camel at R7 and stay there.
- R1: 6 sc in MR (6)
- R2: 6 inc (12)
- R3: (inc, sc) ×6 (18)
- R4: (3 inc, 6 sc) ×2 (24)
- R5: (inc, sc) ×3, 6 sc, (inc, sc) ×3, 6 sc (30)
- R6: (inc, 2 sc) ×3, 6 sc, (inc, 2 sc) ×3, 6 sc (36)
- R7: 12 sc natural, 6 sc camel, 18 sc natural (36)
- R8: 11 sc natural, 8 sc camel, 17 sc natural (36)
- R9: 10 sc natural, 10 sc camel, 16 sc natural (36)
- R10: 9 sc natural, 12 sc camel, 15 sc natural (36)
Do not cut the natural yarn at R7 — carry it loosely up the inside, and hide the camel strand while you work the natural stitches, otherwise the patch pulls tight and puckers. Cut the natural only after R10.
- R11: 10 sc, (inc, sc) ×6, 14 sc (42)
- R12: 42 sc (42)
- R13: 10 sc, (inc, 2 sc) ×6, 14 sc (48)
- R14: 10 sc, (inc, 3 sc) ×6, 14 sc (54)
- R15: (inc, 8 sc) ×6 (60)
- R16–25: 60 sc — 10 rounds
- R26: (dec, 8 sc) ×6 (54)
- R27: 54 sc (54)
- R28: (dec, 7 sc) ×6 (48)
- R29: 48 sc (48)
- R30: (dec, 6 sc) ×6 (42)
Place the eyes on the second round counting back from the last natural round, 9 or 10 stitches apart.
- R31: (dec, 5 sc) ×6 (36)
- R32: (dec, 4 sc) ×6 (30)
Fill with fibre fill.
- R33: (dec, 3 sc) ×6 (24)
- R34: (dec, 2 sc) ×6 (18)
- R35: (dec, sc) ×6 (12)
Stuff the snout and the head firmly before closing — the shape of the face depends on it. Close with a slst and hide the thread.
The expression. Push the eyes in slightly: thread a needle with camel yarn, come out close to one side of an eye with the yarn lying over the top of the eye, pull a little, and pass to the other eye. Repeat on the other side of each eye, adjusting until the eyes sit recessed. That is what makes the snout read as a muzzle.
The nose. Start at the second round from the centre of the magic ring and take in the central 6 sc. Cover the triangle with stitches, add one or two horizontals, then one vertical line down the middle.
Ears (make 2, camel)
- R1: 6 sc in MR (6)
- R2: 6 inc (12)
- R3: (inc, sc) ×6 (18)
- R4–6: 18 sc — 3 rounds
- R7: (dec, 7 sc) ×2 (16)
Close with a slst, leave a tail, do not stuff. Sew them about 11 rounds above the eyes, 12 stitches apart.
The body
Start in camel. The colour changes go on the back of the body, so keep your round start behind you as you work.
- R1: 6 sc in MR (6)
- R2: 6 inc (12)
- R3: (inc, sc) ×6 (18)
- R4: (inc, 2 sc) ×6 (24)
- R5: (inc, 3 sc) ×6 (30)
- R6: (inc, 4 sc) ×6 (36)
- R7: (inc, 5 sc) ×6 (42)
- R8: (inc, 6 sc) ×6 (48)
- R9: (inc, 7 sc) ×6 (54)
- R10–14: 54 sc — 5 rounds
Change to light turquoise.
- R15–19: 54 sc — 5 rounds
- R20: (dec, 7 sc) ×6 (48)
That is six rounds of t-shirt. Change to aquamarine green for the hem.
- R21–22: 48 sc — 2 rounds
- R23: (dec, 6 sc) ×6 (42)
- R24–25: 42 sc — 2 rounds
- R26: (dec, 5 sc) ×6 (36)
- R27–28: 36 sc — 2 rounds
- R29: (dec, 4 sc) ×6 (30)
- R30–31: 30 sc — 2 rounds
- R32: (dec, 3 sc) ×6 (24)
- R33–34: 24 sc — 2 rounds
Close with a slst and leave a long tail for sewing. Fill the body quite firmly.
The legs (make 2)
Start in natural, for the paws.
- R1: 6 sc in MR (6)
- R2: 6 inc (12)
- R3: (inc, sc) ×6 (18)
- R4: (inc, 2 sc) ×6 (24)
- R5: (inc, 3 sc) ×6 (30)
Change to camel.
- R6–9: 30 sc — 4 rounds
- R10: 9 sc, 6 dec, 9 sc (24)
- R11: 8 sc, 4 dec, 8 sc (20)
- R12: 8 sc, 2 dec, 8 sc (18)
- R13–14: 18 sc — 2 rounds
- R15: (dec, 7 sc) ×2 (16)
- R16–17: 16 sc — 2 rounds
- R18: dec, 14 sc (15)
- R19–24: 15 sc — 6 rounds
- R25: (dec, 3 sc) ×3 (12)
Fill up to about R23; the last two rounds stay empty. Then flatten the opening and close it with 1 sc through every pair of stitches — you should end with 6 sc. Leave a long tail.
To hide the colour change where the paw meets the leg, work 2 or 3 extra sc at the end of R25 for the left leg and 7 or 8 for the right before closing.
The arms (make 2)
Start in natural.
- R1: 6 sc in MR (6)
- R2: 6 inc (12)
- R3: (inc, sc) ×6 (18)
- R4: (inc, 2 sc) ×6 (24)
Change to camel.
- R5–8: 24 sc — 4 rounds
- R9: 6 sc, 6 dec, 6 sc (18)
- R10: 6 sc, 3 dec, 6 sc (15)
- R11: 15 sc (15)
- R12: (dec, 3 sc) ×3 (12)
- R13–21: 12 sc — 9 rounds
Add 1 extra sc for the left arm and 2 or 3 for the right, so the natural-to-camel change stays in a straight line on the back. Change to light turquoise.
- R22–23: 12 sc — 2 rounds
Change to aquamarine green.
- R24–25: 12 sc — 2 rounds
- R26: (dec, 4 sc) ×2 (10)
Add 2 extra sc on the left arm and 6 on the right before closing. Fill the arm lightly — the last three rounds stay empty — then flatten and close with 1 sc through every pair, ending with 5 sc.

The tail
- R1: 6 sc in MR (6)
- R2: 6 inc (12)
- R3–4: 12 sc — 2 rounds
- R5: (dec, 2 sc) ×3 (9)
- R6–19: 9 sc — 14 rounds
- R20: flatten and work 4 sc through both sides to close
Fill the base and a little above it, nothing at the top — the tuft end should stay soft.
For the tail tuft, cut wool threads about 18 cm long. With the hook, pull one through a stitch starting at R5, tie a single knot and tighten. Work all the way round the round, then add more threads downwards until every gap is covered. Cut to length at the end.
Assembly
- Head: pins first, colour changes of the body on the back. The head sits about 5 rounds above the last natural round of the snout, resting on the shoulders. Sew with the body’s own tail.
- Legs: three rounds below the first t-shirt round, centred and equidistant. Add two stitches under each leg for security.
- Arms: just under the join between head and body, two stitches underneath as well.
- Tail: one round below the t-shirt.
- Claws: three per paw, in brown thread, over three rounds, 3 stitches apart.
The mane
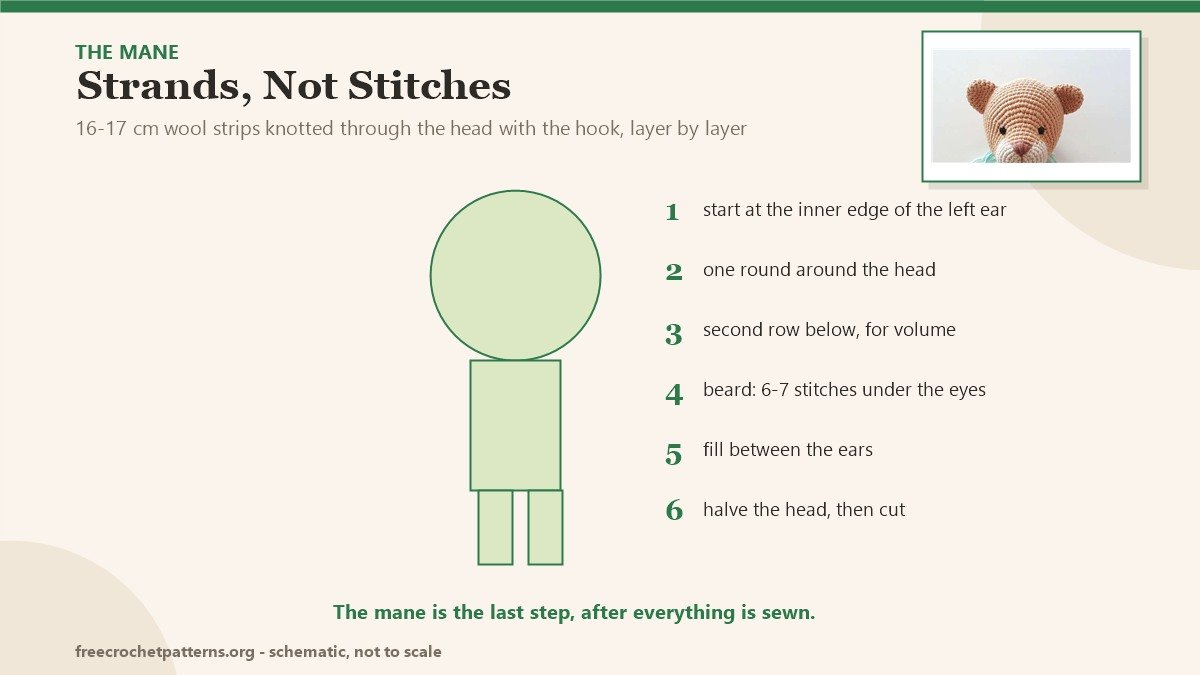
This is the part that takes the time. Cut wool strips 16 or 17 cm long — the width of your palm, wound and cut in series is a good measure.
- Start at the inner edge of the left ear, on the round where the ears were sewn. Pull the strips through with the hook, one knot each, covering every stitch. No holes, no visible stitch: go right round to the back of the neck.
- Second row, one round lower, starting at the centre of the bottom: this is what gives volume.
- The beard: start about 6 or 7 stitches under the line of the eyes and work diagonally down and out on each side, then fill the triangle between them.
- Between the ears, one more line, and extra strips in the gap so nothing shows through.
- Then the rest of the head: either continue in circles following the rounds, or divide the head in half with a line of strips and complete one half, then the other. Behind the ears, go stitch by stitch.
Cut last. Tie the strips behind the ears out of the way, cut the front, the sides and the beard first, then release and shape. Front to just above the eyes; back a little shorter on top and layered. Cut a little at a time — you can always remove strips and tie new ones.
Notes
Tension is the whole game here. A 30 cm lion on a 2.25 mm hook is dense work, and a loose fabric shows the stuffing through the t-shirt. If your stitches gape, drop to 2 mm before you go up a yarn size.
The eyes can be embroidered in black yarn instead of using safety eyes — for a toy going to a baby, embroider them.
More animals in clothes: Three Little Kittens is the three-in-one body with colour charts, Christmas Gnome Cardigan is the one built around a garment, and Layla the Llama is the tall one with a brushable finish. Everything is on the patterns page.
Pattern source: Alan the Lion.
The doll-sized shortcut is here: Lily Bunny crochets the skirt straight into the free loops of the waist round.
1 comment