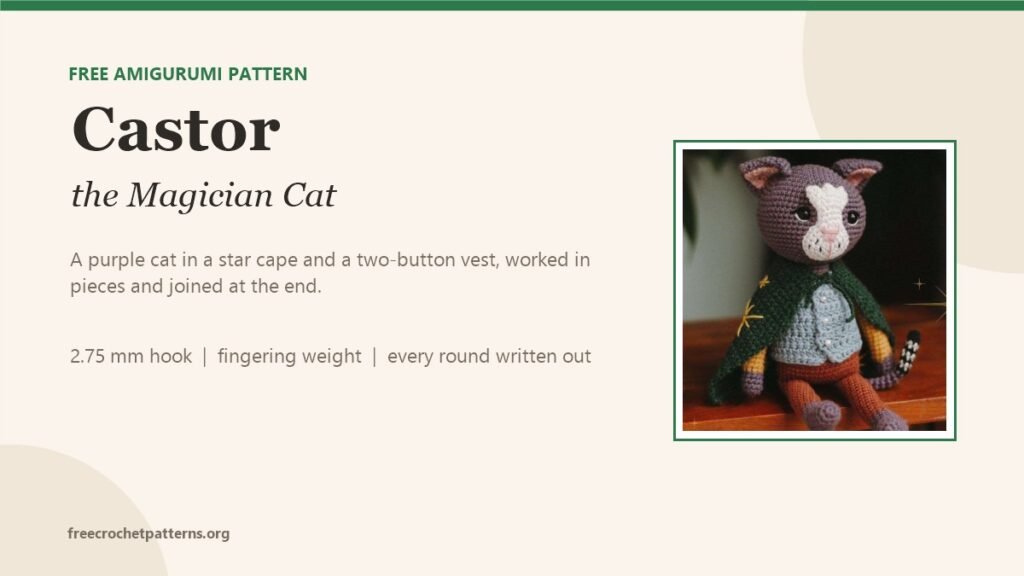
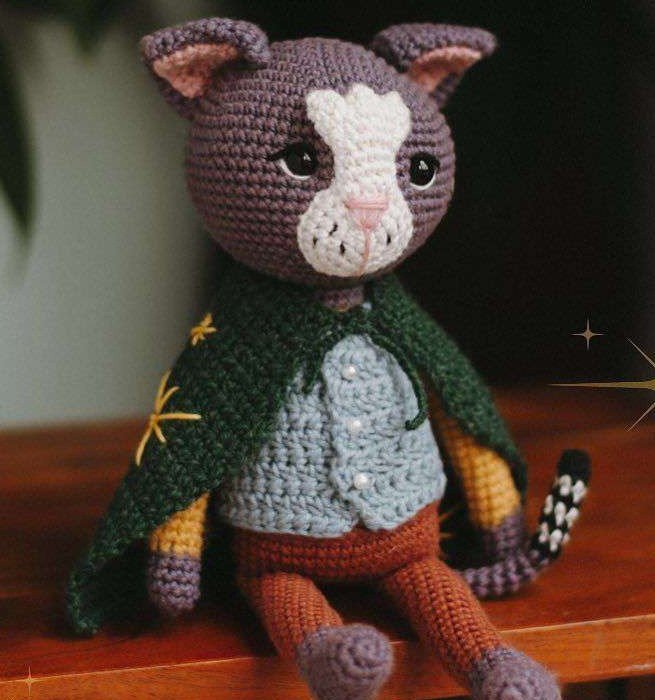
Some dolls look like toys. Castor looks like he walked in from a storybook, sat down on the edge of a shelf and decided to stay. He is a small purple cat in a grey-blue vest with two little buttons, a star-scattered teal cape, and a striped tail that curls up behind him like a question mark.
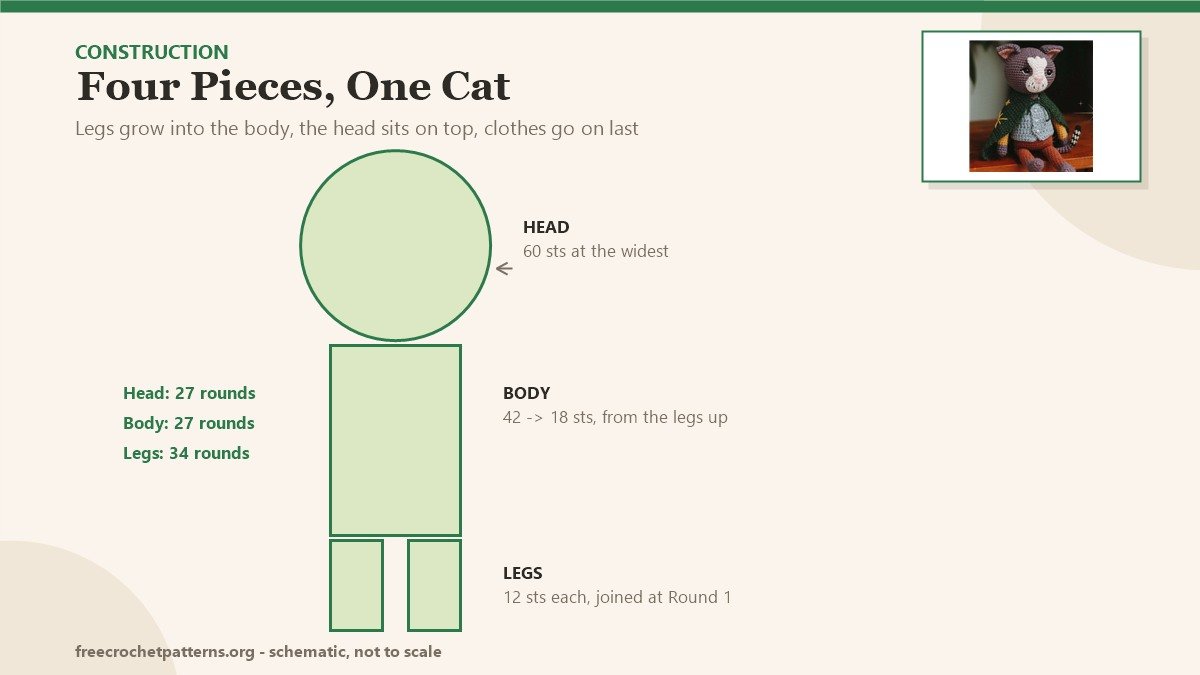
The whole thing is made in pieces and joined at the end, which is much friendlier than it sounds. Legs first, then the body grows straight out of them, the head sits on top, and the clothes are the last pieces you make. If you can crochet a single crochet and an increase in a spiral, you can make Castor.
I have written it out round by round with every stitch count, including the short heel rows that give the legs a proper foot shape. Nothing is summarised and nothing is skipped.
.
What you need
This is a small doll, so the fabric needs to be tight enough that the stuffing does not show through. My hook was 2.75 mm with a fingering / sock weight yarn. If your yarn is thicker, go down a hook size and check the fabric before you commit to the head.
- Yarn, fingering / sock weight: dark purple (head, ears, arms, legs, tail base), copper/brown (legs and body), yellow (collar and the long part of the arms), white (muzzle and inner face), black and white (tail stripes), pink (inner ears), grey-blue (vest), teal (cape)
- Hook: 2.75 mm (or the size that gives you a dense fabric)
- Safety eyes: 8 mm, one pair
- Toy stuffing: polyester fibrefill
- Notions: scissors, sewing needle, stitch marker, two small buttons, an optional pipe cleaner for the tail
Abbreviations
- MR magic ring
- RND round, ROW row
- CH chain, SC single crochet, HDC half double crochet, SLST slip stitch
- INC increase (2 SC in one stitch), DEC decrease
- FLO front loops only, BLO back loops only
- HDC INC 2 HDC in one stitch
Before you start: three habits that save the doll
- Work in a continuous spiral unless a section says otherwise. Move your stitch marker at the start of every round so the counts stay honest.
- Shift stitches before a colour change. When the pattern says to centre the change, work a few extra single crochets until the new colour starts where you want it — at the heel for the legs, at the centre back for the body.
- Stuff as you go. The legs, body and head are much easier to fill while the opening is still wide.
.
Legs (make 2)
Work in dark purple, in a spiral.
- RND 1: 6 SC in MR (6)
- RND 2: INC x6 (12)
- RND 3–7: SC in all (12) — 5 rounds
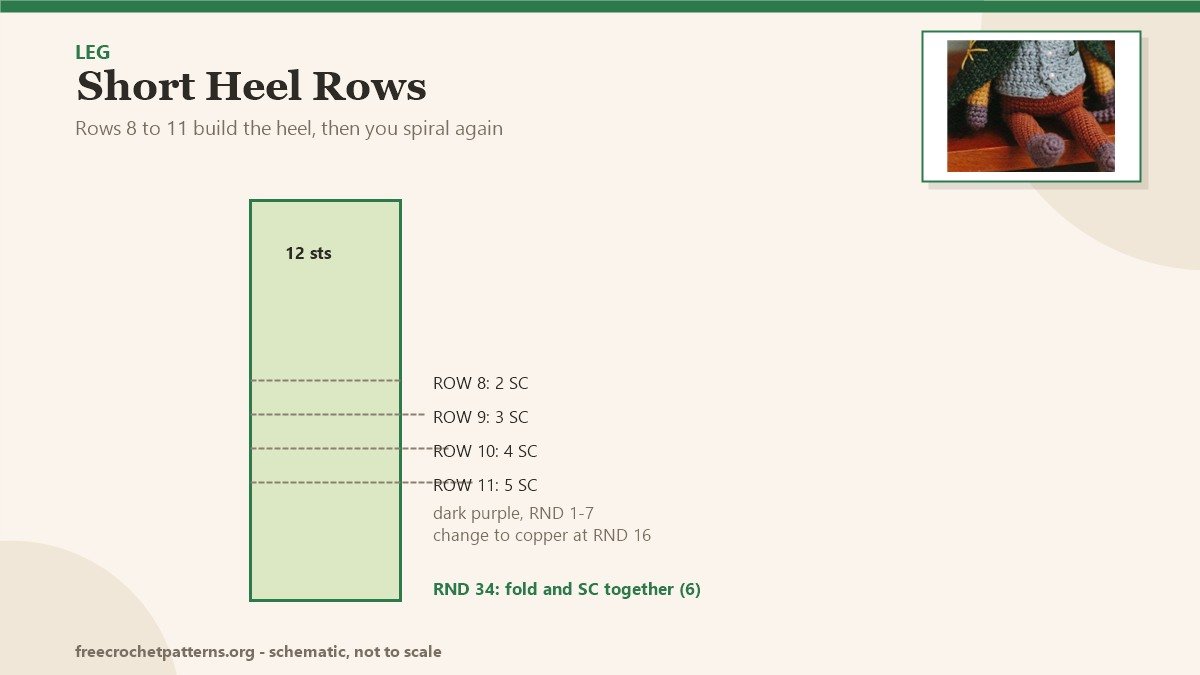
The next four rows shape the heel, so you turn instead of spiralling.
- ROW 8: 2 SC, SLST, CH 1, turn
- ROW 9: 3 SC, SLST, CH 1, turn
- ROW 10: 4 SC, SLST, CH 1, turn
- ROW 11: 5 SC, SLST, CH 1, turn
Back to the spiral. Stuff as you go.
- RND 12–15: SC in all (12) — 4 rounds
- Change to copper/brown, centring the change with the heel
- RND 16–33: SC in all (12) — 18 rounds
- RND 34: fold in half with the foot facing forward and SC together (6)
Fasten off the first leg and weave in the end. Leave the second leg on the hook — the body starts from it.
.
Body
Still in copper/brown, spiralling, with both feet pointing the same way.
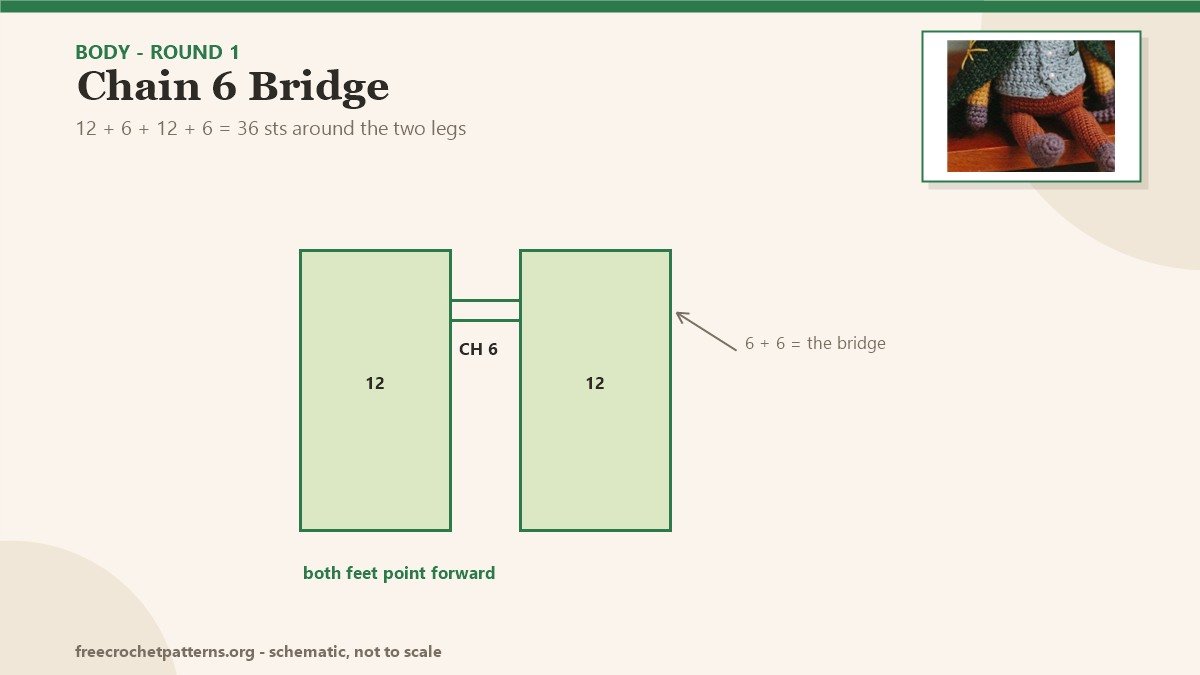
- RND 1: CH 6, join the second leg with SC in FLO x6, SC in BLO across the chain, SC in BLO x6, SC in FLO x6, SC across the chain (36)
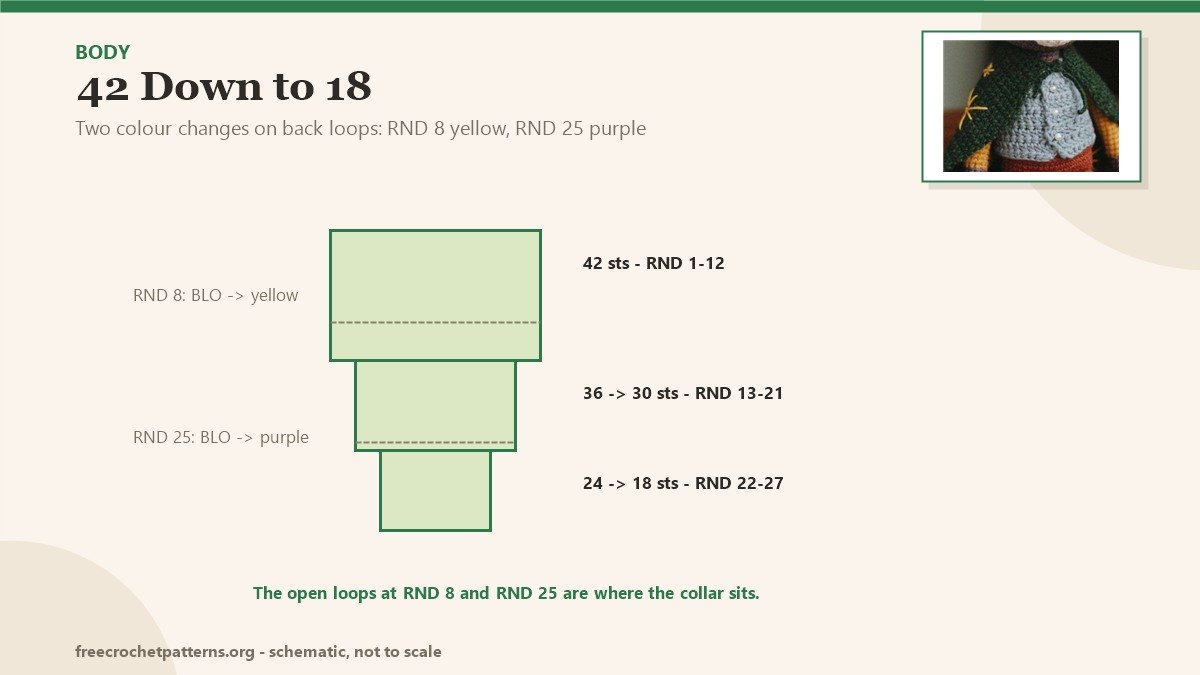
- RND 2: (5 SC, INC) x6 (42)
- RND 3–7: SC in all (42) — 5 rounds
- RND 8: change to yellow, BLO SC in all (42)
- RND 9–12: SC in all (42) — 4 rounds
- RND 13: (5 SC, DEC) x6 (36)
- RND 14–17: SC in all (36) — 4 rounds
- RND 18: (4 SC, DEC) x6 (30)
- RND 19–21: SC in all (30) — 3 rounds
- RND 22: (3 SC, DEC) x6 (24)
- RND 23–24: SC in all (24) — 2 rounds
- RND 25: change to dark purple, BLO (2 SC, DEC) x6 (18)
- RND 26–27: SC in all (18) — 2 rounds
Fasten off and weave in the end. Those two exposed loops at Round 8 and Round 25 are not a mistake — they are where the collar and the clothes attach.
.
Collar
- RND 1: in yellow, attach to the front loops of BODY Round 25 and SLST in each stitch (24)
Fasten off and weave in.
.
Head
Dark purple, in a spiral.
- RND 1: 6 SC in MR (6)
- RND 2: INC x6 (12)
- RND 3: (1 SC, INC) x6 (18)
- RND 4: (2 SC, INC) x6 (24)
- RND 5: (3 SC, INC) x6 (30)
- RND 6: (4 SC, INC) x6 (36)
- RND 7: (5 SC, INC) x6 (42)
- RND 8: (6 SC, INC) x6 (48)
- RND 9: (7 SC, INC) x6 (54)
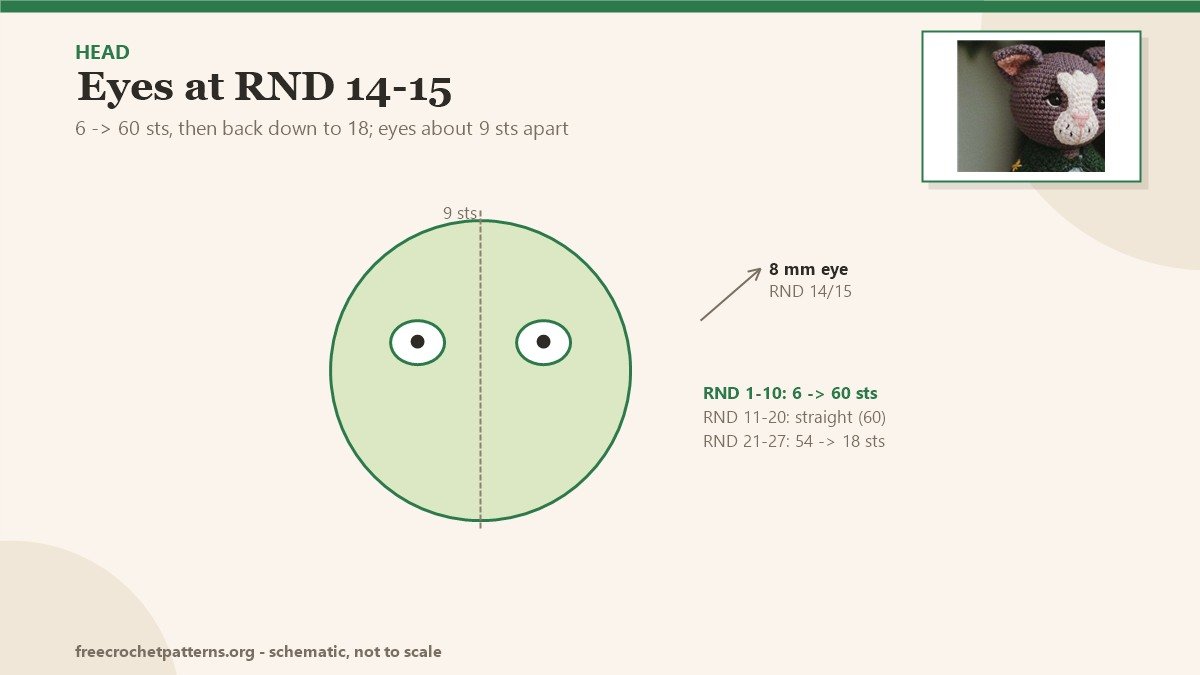
- RND 10: (8 SC, INC) x6 (60)
- RND 11–20: SC in all (60) — 10 rounds
Insert the 8 mm safety eyes between Rounds 14 and 15, about 9 stitches apart, and stuff as the head closes.
- RND 21: (8 SC, DEC) x6 (54)
- RND 22: (7 SC, DEC) x6 (48)
- RND 23: (6 SC, DEC) x6 (42)
- RND 24: (5 SC, DEC) x6 (36)
- RND 25: (4 SC, DEC) x6 (30)
- RND 26: (3 SC, DEC) x6 (24)
- RND 27: (2 SC, DEC) x6 (18)
Fasten off with a long tail and sew the head to the body.
.
Arms (make 2)
- RND 1: dark purple, 5 SC in MR (5)
- RND 2: INC x5 (10)
- RND 3–5: SC in all (10) — 3 rounds
- RND 6: change to yellow
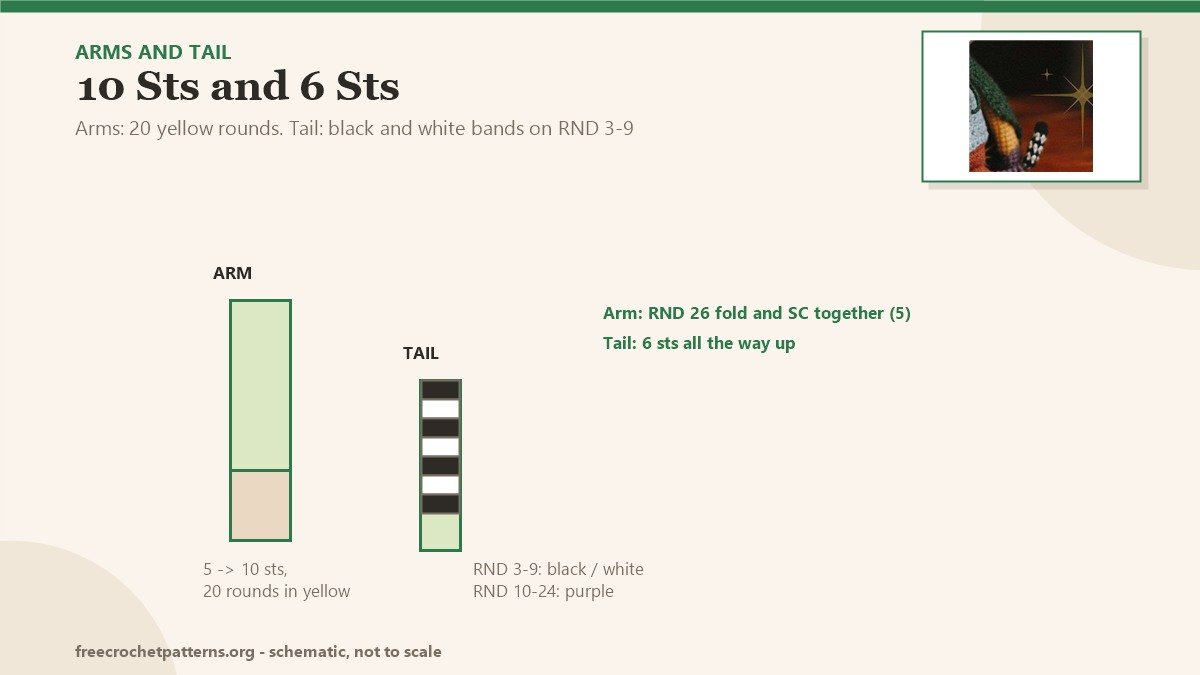
- RND 6–25: SC in all (10) — 20 rounds, stuffing lightly as you go
- RND 26: fold in half and SC together (5)
Fasten off with a long tail. Sew one arm on each side of the body, just below the collar.
.
Tail
- RND 1: dark purple, 6 SC in MR (6)
- RND 2: SC in all (6)
- RND 3: change to black, SC in all (6)
- RND 4: change to white, SC in all (6)
- RND 5: change to black, SC in all (6)
- RND 6: change to white, SC in all (6)
- RND 7: change to black, SC in all (6)
- RND 8: change to white, SC in all (6)
- RND 9: change to black, SC in all (6)
- RND 10–24: change to dark purple, SC in all (6) — 15 rounds
Fasten off with a long tail. A pipe cleaner pushed inside before you sew it on keeps the curl where you put it.
Ears (make 2)
Dark purple, in a spiral.
- RND 1: 5 SC in MR (5)
- RND 2: SC in all (5)
- RND 3: INC x5 (10)
- RND 4: SC in all (10)
- RND 5: (SC, INC) x5 (15)
- RND 6: (2 SC, INC) x5 (20)
- RND 7: SC in all (20)
- RND 8: (3 SC, INC) x5 (25)
- RND 9: (4 SC, INC) x5 (30)
- RND 10–11: SC in all (30) — 2 rounds
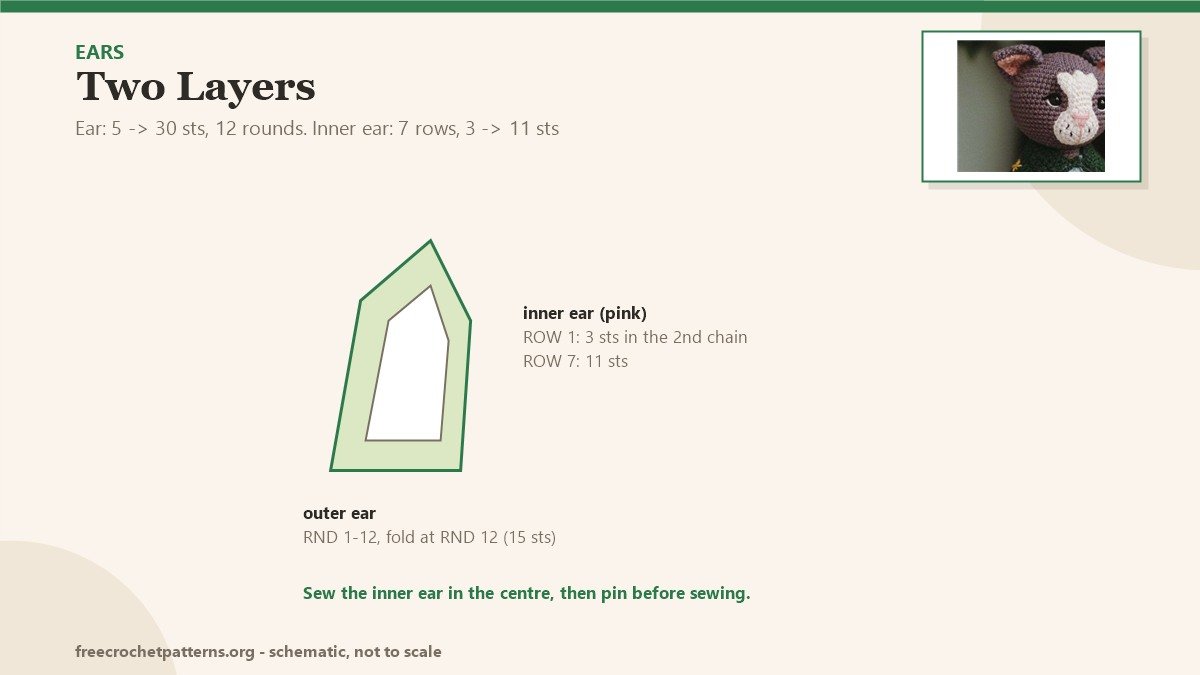
- RND 12: fold in half and SC together (15)
Fasten off with a long tail and sew to the top of the head.
Inner ears (make 2)
Pink, in rows.
- ROW 1: CH 2, 3 SC in the second chain from the hook, CH 1, turn (3)
- ROW 2: INC, SC, INC, CH 1, turn (5)
- ROW 3: INC, 3 SC, INC, CH 1, turn (7)
- ROW 4: SC in all, CH 1, turn (7)
- ROW 5: INC, 5 SC, INC, CH 1, turn (9)
- ROW 6: SC in all, CH 1, turn (9)
- ROW 7: INC, 7 SC, INC (11)
Fasten off with a long tail and sew one inner ear into the centre of each ear.
.
Muzzle
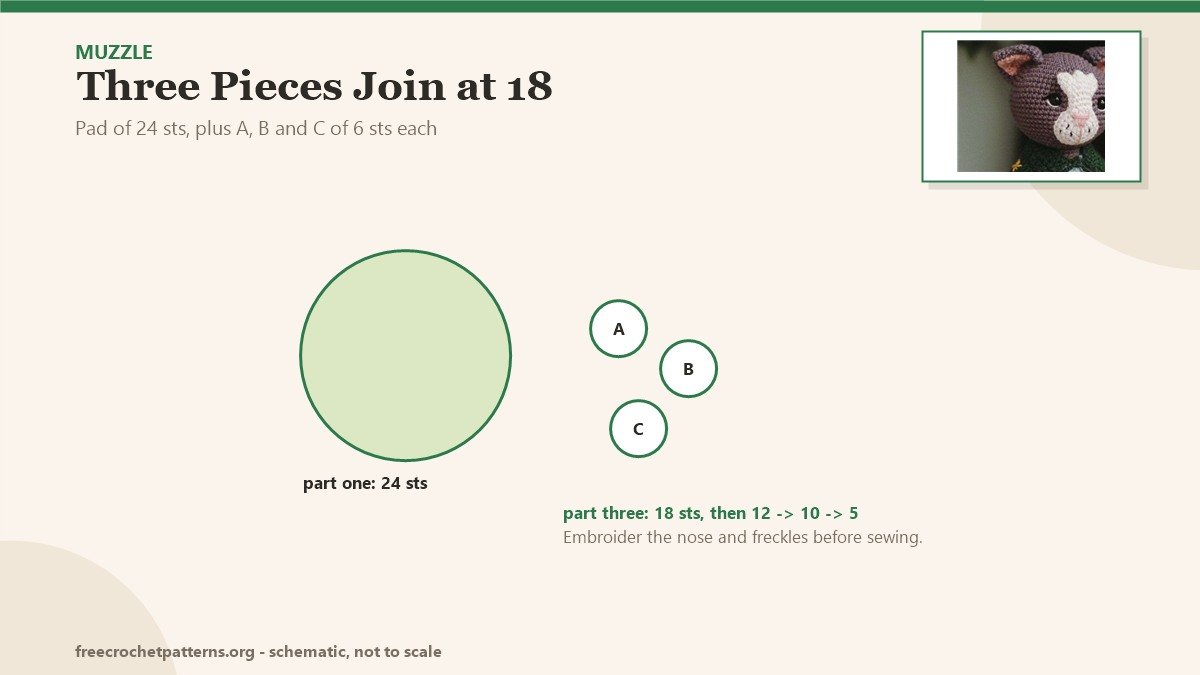
This is the only fiddly part, and it is worth it — the muzzle is what makes the face read as a cat.
Part one (the round pad)
- RND 1: white, 6 SC in MR (6)
- RND 2: INC x6 (12)
- RND 3: (SC, INC) x6 (18)
- RND 4: (2 SC, INC) x6 (24)
Fasten off and weave in the end.
Part two (pieces A, B and C)
- RND 1: white, 4 SC in MR (4)
- RND 2: (SC, INC) x2 (6)
- RND 3: SC in all (6)
Repeat Rounds 1–3 for pieces B and C. Fasten off A and B. Do not cut the yarn on C — you carry on straight into part three.
Part three (joining the three pieces)
- RND 1: starting from piece C: crochet 3 SC around half of piece A, join piece B with 6 SC around it, 3 SC around the rest of piece A, then 6 SC around piece C (18)
You should have exactly 18 stitches joining the three pieces.
- RND 2: (SC, DEC) x6 (12)
- RND 3: (3 SC, DEC) x2 (10)
- RND 4–5: SC in all (10) — 2 rounds
- RND 6: fold in half and SC together (5) — do not cut
Part four (closing the pad)
- RND 1: attach back to part one, then INC, (5 SC, INC) x3, SLST
Fasten off with a long tail. Embroider the nose and the freckles before you sew the muzzle to the head — it is much easier flat on the table than on the finished face.
.
Vest
Grey-blue, worked in rows. CH 1 and turn at the end of every row.
- ROW 1: CH 31, HDC in the second chain from the hook and across (30)
- ROW 2: HDC INC, 30 HDC, HDC INC (32)
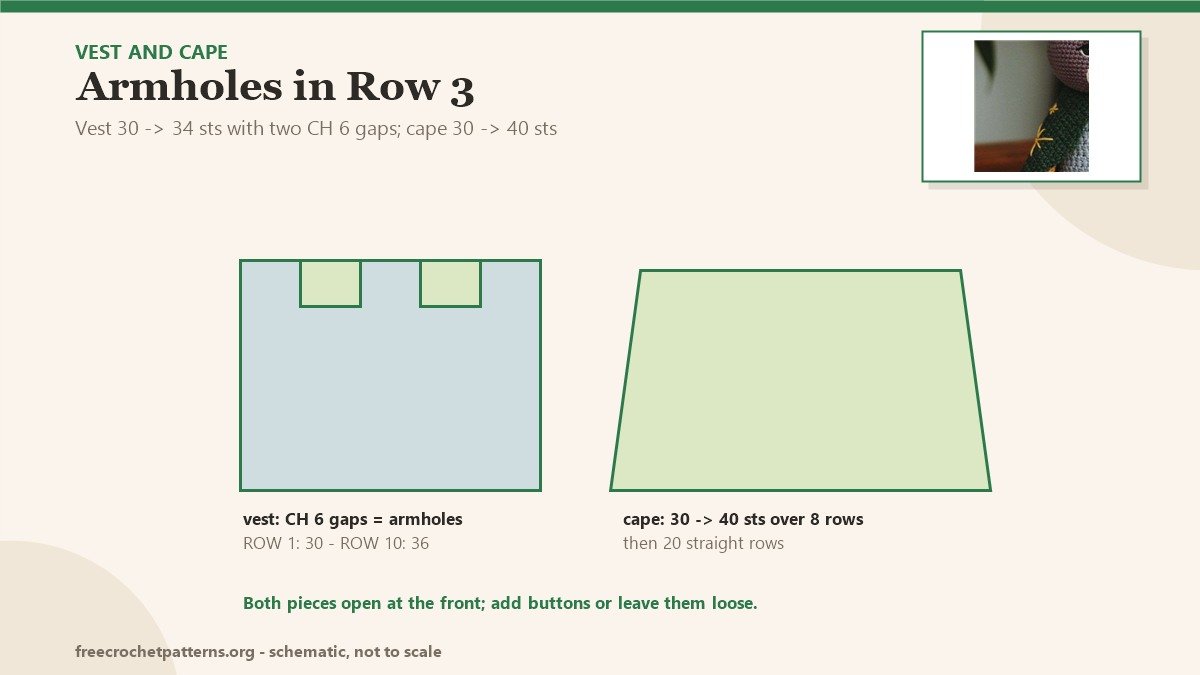
- ROW 3: HDC INC, 4 HDC, CH 6, skip 6, 10 HDC, CH 6, skip 6, 4 HDC, HDC INC (34)
- ROW 4: 6 HDC, 6 HDC into the CH 6 space, 10 HDC, 6 HDC into the CH 6 space, 6 HDC (34)
- ROWS 5–9: HDC in all (34) — 5 rows
- ROW 10: HDC INC, 32 HDC, HDC INC (36)
- ROWS 11–13: HDC in all (36) — 3 rows
Fasten off and weave in the ends. Row 3 is where the armholes appear: the two CH 6 gaps become the openings for the arms.
Cape
Teal, worked in rows, CH 1 and turn at the end of each one.
- ROW 1: CH 31, HDC across (30)
- ROW 2: HDC in all (30)
- ROW 3: HDC INC, 28 HDC, HDC INC (32)
- ROW 4: HDC in all (32)
- ROW 5: HDC INC, 30 HDC, HDC INC (34)
- ROW 6: HDC INC, 32 HDC, HDC INC (36)
- ROW 7: HDC INC, 34 HDC, HDC INC (38)
- ROW 8: HDC INC, 36 HDC, HDC INC (40)
- ROWS 9–28: HDC in all (40) — 20 rows
Fasten off and weave in. For the straps, attach yarn to the first stitch of Row 1, chain 25 (or to the length you want), fasten off, and repeat on the last stitch of Row 1.
The stars are the fun part: embroider a few in yellow, or cut them from felt. I added a handful to one shoulder so the cape reads as “magician” from across the room.
.
Assembly, in the order that works
- Sew the muzzle between the eyes, sitting just under them.
- Sew each inner ear into the centre of its ear, then pin the ears to the top of the head before sewing — a centimetre either way changes the whole expression.
- Sew the tail below the colour change at the centre back.
- Sew the head to the body, then the arms below the collar.
- Try the vest on before you commit: leave it open so it can be taken off, or add two buttons and sew it down.
Little variations
The vest and cape are the easiest things to change. Leave the cape plain, or cover it in stars, dots or tiny flowers. If you want a different silhouette, work a small skirt into the front loops at Body Round 8 — the fabric is already there, waiting.
If you make a Castor, I would love to see him. He sits nicely on a shelf next to a bigger doll, and if you want a much larger amigurumi to keep him company, the 26-inch Grinch with a removable Santa coat is built the same way: pieces first, assembly last. You can find every pattern on the site on the patterns page.
Pattern source: Castor the Magician Cat, designed by @egracecrochet.
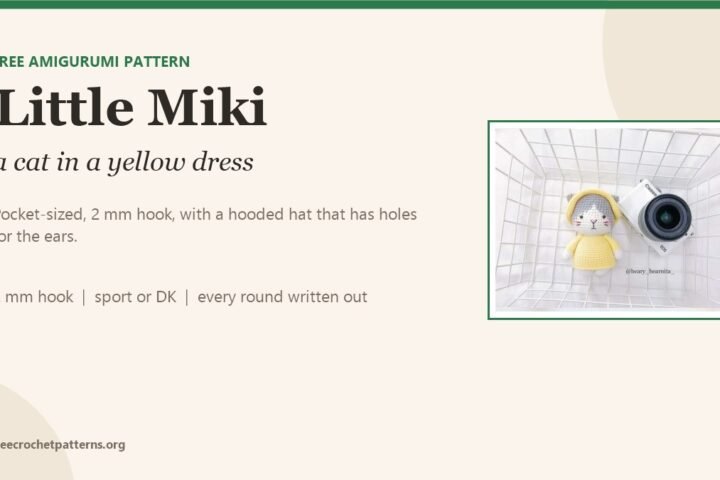
If you want a smaller project from the same family, Little Miki Cat is a 4-inch amigurumi in a yellow dress, crocheted with the same logic: the body grows out of the legs and the clothes are the last thing you add.
The smallest cat in the collection is Cucho the Cat: 12 cm in chunky yarn, with a 24-scallop ruffle hat that takes a single round.
2 comments