
This is a brown bear in a Santa hat, with two crocheted buttons down the front, a red bow tie and white boots. He is about 25 cm tall in super bulky yarn, and he is one continuous piece from the legs up: the legs are joined at round 8, the body and head follow, and the arms are crocheted in at round 20.
Two things make him read as a Christmas toy rather than a brown blob. The first is the hat, which is worked in white for the brim, red for the crown, and finished with a white bobble for the pom-pom. The second is the buttons: two bobble stitches, one red and one green, set into the body on rounds 13 and 15.
Everything is written out below, including where the bobbles go and how the arms are joined.

What you need
- Yarn: super bulky (size 6) in brown, white, red and a little green
- Hook: 5 mm
- Safety eyes: 14 mm
- Notions: stuffing, darning needle, stitch marker
Abbreviations
- MR magic ring, sc single crochet, dec invisible decrease, inc increase
- BLO back loop only, FLO front loop only, BO bobble stitch (5 loops), slst slip stitch
- R round
Arms (make 2, brown)
- R1: 5 sc in MR (5)
- R2: inc x5 (10)
- R3: BLO (4 sc, inc) x2 (12)
- R4–5: change to white, sc around (12) — 2 rounds
- R6: change to brown, (sc, dec) x4 (8)
- R7–9: sc around (8) — 3 rounds
Stuff the arms, but do not stuff past round 5. Close with 4 sc across. No long tail is needed: the arms are crocheted onto the body.
Bow tie (red)
- R1: ch 6, starting in the second chain from the hook: 5 sc in the back loops, ch 1, turn
- R2: 5 sc in the back loops, ch 1, turn
Repeat R2 three more times. Fasten off leaving a long tail, bring the tail to the centre and wrap it around a few times to make the knot. Sew the bow tie onto the neck.
Santa hat
Start in white for the pom-pom.
- R1: 5 sc in MR (5)
- R2: inc x5 (10)
- R3: sc around (10)
- R4: dec x5 (5)
Change to red.
- R5: FLO sc around (5)
- R6: inc x5 (10)
- R7: (4 sc, inc) x2 (12)
- R8: (3 sc, inc) x3 (15)
- R9: sc around (15)
- R10: (4 sc, inc) x3 (18)
- R11: (2 sc, inc) x6 (24)
- R12: sc around (24)
Change to white for the brim.
- R13: BLO sc around (24)
- R14: sc around (24)
Fasten off, long tail for sewing.

Legs (make 2, brown)
- R1: 6 sc in MR (6)
- R2: inc x6 (12)
- R3: BLO (2 sc, inc) x4 (16)
- R4–5: change to white, sc around (16) — 2 rounds
- R6: change to brown, (2 sc, dec) x4 (12)
- R7: sc around (12)
Fasten off leg 1 leaving a tail to close the gap. Do not fasten off leg 2.
Body and head (one piece, brown)
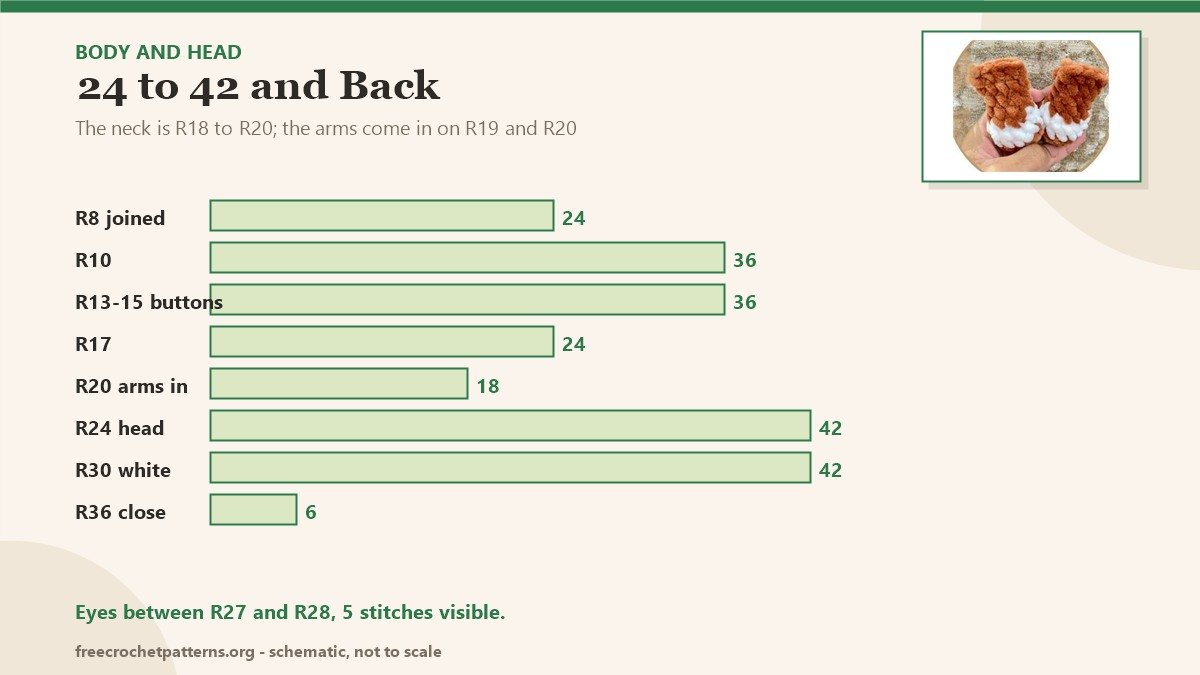
- R8: connect leg 1: sc in each stitch of leg 1, then sc in each stitch of leg 2 (24)
- R9: (3 sc, inc) x6 (30)
- R10: 2 sc, (4 sc, inc) x5, 2 sc (36)
- R11–12: sc around (36) — 2 rounds
- R13: 17 sc, red bobble stitch, 18 sc (36)
- R14: sc around (36)
- R15: 17 sc, green bobble stitch, 18 sc (36)
- R16: 2 sc, (4 sc, dec) x5, 2 sc (30)
- R17: (3 sc, dec) x6 (24)
- R18: (2 sc, dec) x6 (18)
- R19: sc around (18) — attach the arms on this round
- R20: 4 sc, 4 sc through the first arm, 5 sc, 4 sc through the second arm, 1 sc (18)
- R21: (2 sc, inc) x6 (24)
- R22: (3 sc, inc) x6 (30)
- R23: (4 sc, inc) x6 (36)
- R24: (5 sc, inc) x6 (42)
- R25–29: sc around (42) — 5 rounds
Add the eyes between R27 and R28, leaving 5 stitches visible between them.
- R30: change to white, sc around (42)
- R31: (5 sc, dec) x6 (36)
- R32: change to brown, (4 sc, dec) x6 (30)
- R33: (3 sc, dec) x6 (24)
- R34: (2 sc, dec) x6 (18)
- R35: (sc, dec) x6 (12)
- R36: dec x6 (6)
Stuff, fasten off, close and weave in the ends. Use the long leg-1 tail to sew the gap between the legs shut before you stuff the body.
Assembly and finishing
- Sew the hat onto the head, tilted, with the increases at the sides.
- Sew the bow tie at the neck, over the white round R30 or just above it.
- Embroider the nose between the eyes.
- Sew the two bobbles down if they sit loose — a stitch through the centre of each one fixes them.
The bobbles are the only fiddly part. Work them loosely, and turn the piece inside out afterwards to push each one forward; a bobble that is worked too tight disappears into the body.

Notes
Super bulky yarn makes this a fast project but an unforgiving one: a missed increase on R10 shows up as a lopsided shoulder. Count that round twice.
For other soft toys on the site, Cream and Brown Kitty uses the same joined-legs construction in worsted weight, Purple Zombie Bunny is the plush version, and Mini Pumpkin Man is the smallest. Everything is on the patterns page.
Pattern source: brown bear in a Santa hat, as shared by the original designer on the amigurumi pattern blogs.
A quick autumn make to go with a bigger toy: Mini Ribbed Pumpkin, forty minutes each.
The Christmas figure in clothes is Christmas Gnome: a tree hat, a top-down cardigan and green underpants.


1 comment