
This is a proper jointed cat: 8.5 inches sitting, 10.5 inches standing, cream body with brown ears, tail and paws. The head and the body are one piece of 41 rounds, which is why the neck comes out clean without any sewing, and the legs are attached with a jointed technique so the cat can sit, stand or sprawl.
It is not a small project. There are 41 rounds in the main piece, plus two 19-round legs, two 18-round arms, a 21-round tail, a muzzle, two ears, eight toes and two foot pads. But none of it is difficult: the whole pattern is single crochet, increases and decreases, with the eyes placed at round 12.
If you have made a few amigurumi before, this is the pattern that will make your cats look like cats. The muzzle and the toes are what do it.
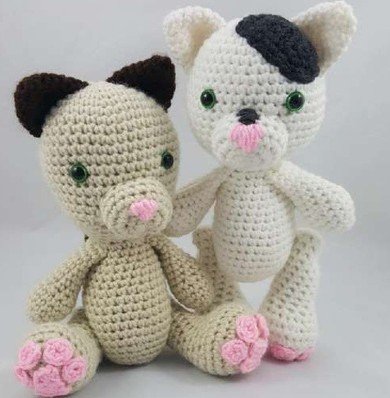
What you need
- Yarn: worsted weight in cream and brown, plus a little pink for the nose, toes and pads
- Hook: 4.5 mm — 4 mm if your yarn is thinner than Caron 1lb
- Safety eyes: 12 mm
- Notions: stuffing, yarn needle, stitch marker
Crochet tightly: amigurumi needs a dense fabric so the stuffing does not show. If you change yarn weight, go down a hook size rather than up.
Abbreviations
- ch chain, sc single crochet, hdc half double crochet, slst slip stitch
- inc two sc in one stitch, dec one sc over two stitches
- Rnd round, and the number in brackets is the total stitch count
Worked in continuous rounds. Put a stitch marker in the first stitch of each round.
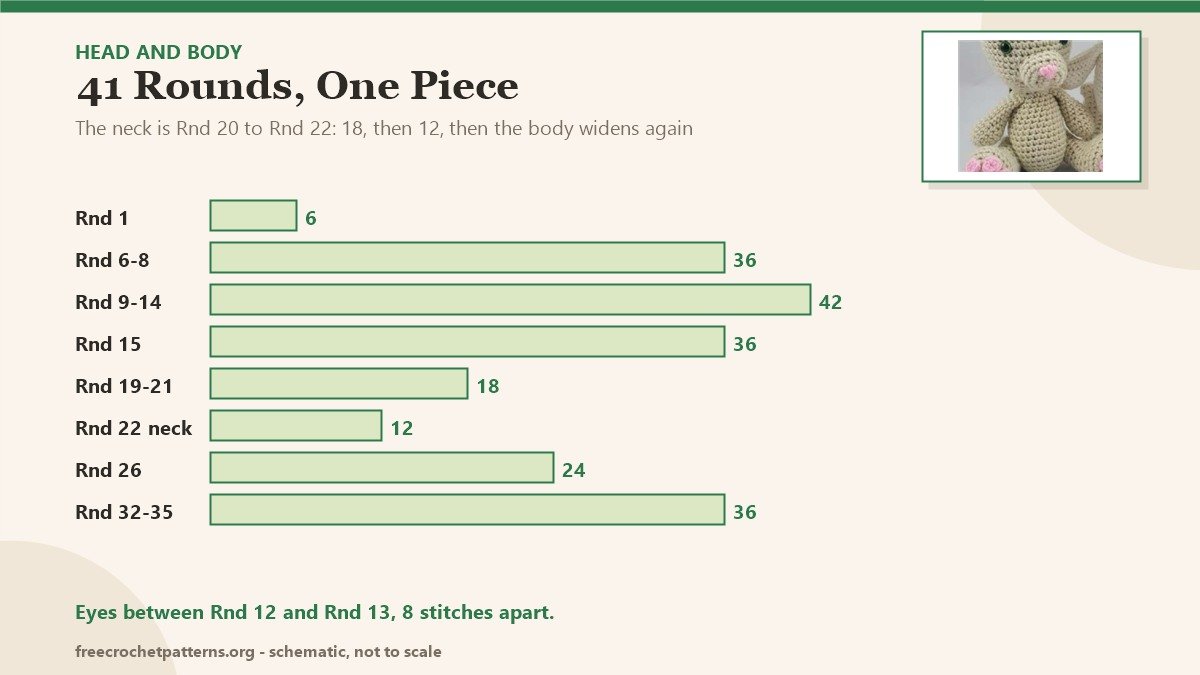
Head and body (one piece, cream)
Start with a chain of 2.
- Rnd 1: 6 sc in the second chain from the hook (6)
- Rnd 2: inc x6 (12)
- Rnd 3: (inc, sc) x6 (18)
- Rnd 4: (inc, 2 sc) x6 (24)
- Rnd 5: (inc, 3 sc) x6 (30)
- Rnd 6: (inc, 4 sc) x6 (36)
- Rnd 7–8: sc around (36) — 2 rounds
- Rnd 9: (inc, 5 sc) x6 (42)
- Rnd 10–14: sc around (42) — 5 rounds
- Rnd 15: (dec, 5 sc) x6 (36)
- Rnd 16–17: sc around (36) — 2 rounds
- Rnd 18: (dec, 4 sc) x6 (30)
- Rnd 19: (dec, 3 sc) x6 (24)
Attach the safety eyes between Rnd 12 and Rnd 13, about 8 stitches apart. This is the head; everything after Rnd 22 is the body.
- Rnd 20: (dec, 2 sc) x6 (18)
- Rnd 21: (dec, sc) x6 (12)
- Rnd 22: sc around (12)
- Rnd 23: (inc, sc) x6 (18)
- Rnd 24–25: sc around (18) — 2 rounds
- Rnd 26: (inc, 2 sc) x6 (24)
- Rnd 27–28: sc around (24) — 2 rounds
Stuff the head firmly now, without stretching the stitches.
- Rnd 29: (inc, 3 sc) x6 (30)
- Rnd 30–31: sc around (30) — 2 rounds
- Rnd 32: (inc, 4 sc) x6 (36)
- Rnd 33–35: sc around (36) — 3 rounds
- Rnd 36: (dec, 4 sc) x6 (30)
- Rnd 37: sc around (30)
- Rnd 38: (dec, 3 sc) x6 (24)
- Rnd 39: (dec, 2 sc) x6 (18)
- Rnd 40: (dec, sc) x6 (12)
Finish stuffing the neck and the body — the neck wants to be firm, or the head will loll.
- Rnd 41: dec x6 (6)
Slst in the first stitch of the previous round, fasten off leaving a long tail, and whip stitch the hole closed.
Ears (make 2, brown)
- Ch 2, Rnd 1: 6 sc in the second chain from the hook (6)
- Rnd 2: sc in all 6 st (6)
- Rnd 3: inc x6 (12)
- Rnd 4–5: sc in all 12 st (12) — 2 rounds
- Rnd 6: (inc, 2 sc) x4 (16)
- Rnd 7: sc in all 16 st (16)
Slst in the first stitch, fasten off leaving a long tail, flatten the ear and attach it to the head starting at Rnd 2 and ending near Rnd 8.
Muzzle (cream)
- Ch 2, Rnd 1: 5 sc in the second chain from the hook (5)
- Rnd 2: inc x5 (10)
- Rnd 3: 2 sc, 3 sc in each of the next 2 st, 3 sc, 3 sc in each of the next 2 st, sc (18)
- Rnd 4–6: sc in each st around (18) — 3 rounds
Slst, fasten off, stuff the muzzle and attach it to the face with the top aligned at Rnd 13 and the bottom at Rnd 20.
For the nose, use pink yarn: start in the centre stitch between Rnd 4 and Rnd 5, insert the needle between Rnd 1 and Rnd 2, and repeat five times. Move one stitch left and repeat, then mirror it on the right side, and finish with one horizontal stitch across the top.

Arms (make 2, cream)
- Ch 2, Rnd 1: 5 sc in the second chain from the hook (5)
- Rnd 2: inc x5 (10)
- Rnd 3: (inc, sc) x5 (15)
- Rnd 4–5: sc in all 15 st (15) — 2 rounds
- Rnd 6: (dec, sc) x5 (10)
Stuff the arm now. Do not add stuffing after this point, or add very little.
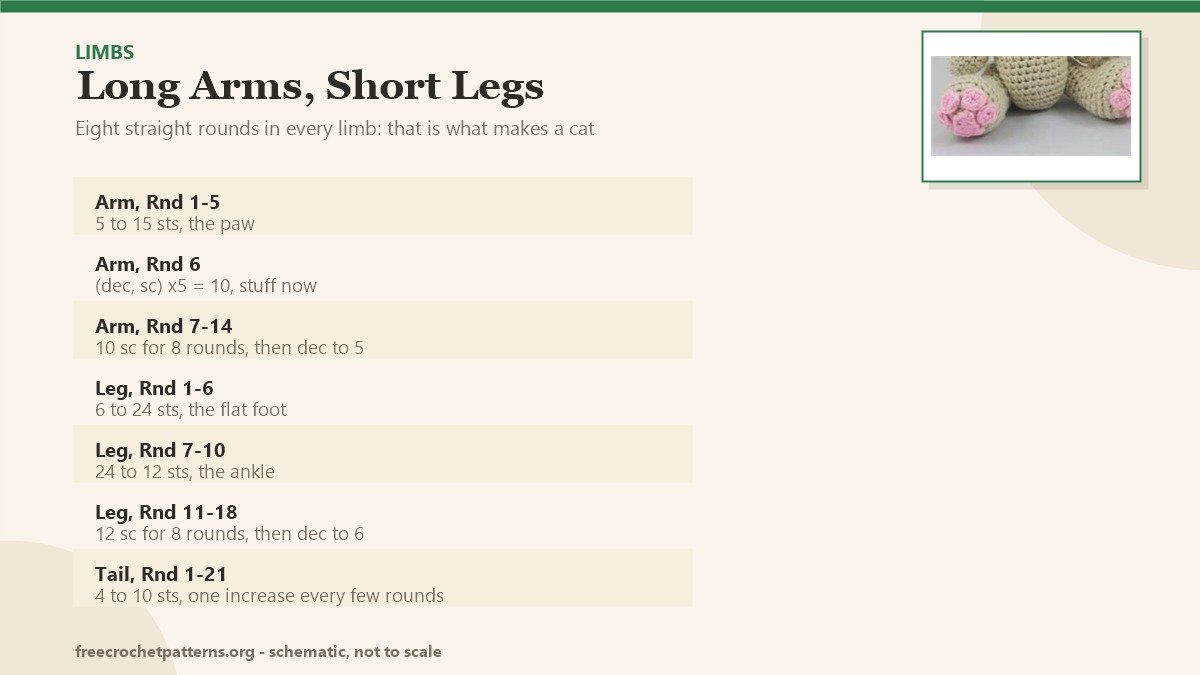
- Rnd 7–14: sc in all 10 st (10) — 8 rounds
- Rnd 15: dec x5 (5)
Slst, fasten off, leave a long tail and close the hole.
Legs (make 2, cream)
- Ch 2, Rnd 1: 6 sc in the second chain from the hook (6)
- Rnd 2: inc x6 (12)
- Rnd 3: (inc, sc) x6 (18)
- Rnd 4: (inc, 2 sc) x6 (24)
- Rnd 5–6: sc in all 24 st (24) — 2 rounds
- Rnd 7: 6 sc, (sc, dec) x4, 6 sc (20)
- Rnd 8: 4 sc, dec x6, 4 sc (14)
- Rnd 9: sc in all 14 st (14)
- Rnd 10: 4 sc, dec, 2 sc, dec, 4 sc (12)
- Rnd 11–18: sc in all 12 st (12) — 8 rounds
Stuff the leg firmly but do not stretch the stitches.
- Rnd 19: dec x6 (6)
Slst, fasten off, whip stitch the hole closed. Attach the legs to the body with a jointed technique — a long needle through the body and both legs, pulled tight — so they can move.
Tail (brown)
- Ch 2, Rnd 1: 4 sc in the second chain from the hook (4)
- Rnd 2: (sc, inc) x2 (6)
- Rnd 3–4: sc in all 6 st (6) — 2 rounds
- Rnd 5: (sc, inc, sc) x2 (8)
- Rnd 6–8: sc in all 8 st (8) — 3 rounds
- Rnd 9: (sc, sc, inc, sc) x2 (10)
- Rnd 10–21: sc in all 10 st (10) — 12 rounds
Stuff the tail firmly without stretching, slst, fasten off and attach it low on the back of the body.
Toes and foot pads (pink)
Toes, make 8: ch 2, 5 sc in the second chain from the hook, slst in the first stitch, fasten off.
Foot pad, make 2: ch 2, row 1: 2 hdc in the second chain from the hook, turn (2). Row 2: 1 hdc in each stitch, turn (2). Row 3: 2 sc in each hdc (4). Fasten off.
Either stitch or glue the pads and toes on: the pad in the centre of the foot, then four toes evenly around the top and side of the pad.
Assembly
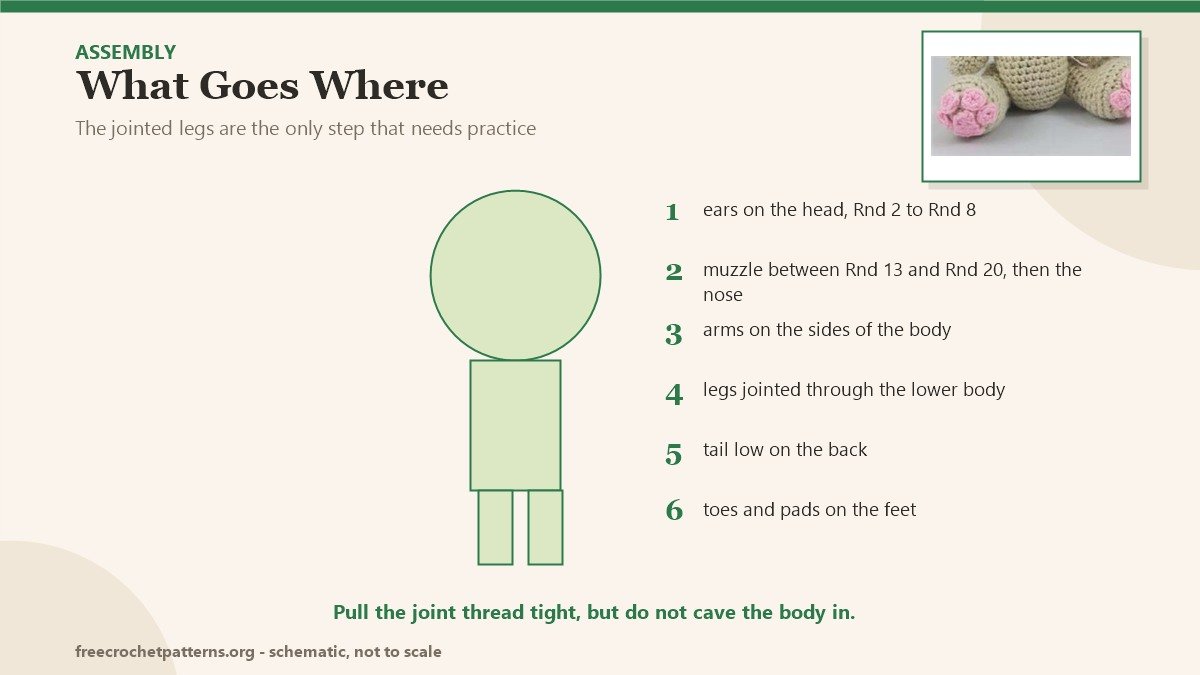
- Attach the ears to the head, Rnd 2 to Rnd 8.
- Attach the muzzle between Rnd 13 and Rnd 20, then embroider the nose.
- Attach the arms at the sides of the body.
- Joint the legs through the lower body.
- Attach the tail low on the back.
- Add the toes and pads.
Notes
The jointed legs are the only part that needs practice: thread a long needle from one hip through the body and out the other, then back through, pulling firmly enough that the legs stay where you put them but not so hard that the body caves in. If you would rather not joint them, sew the legs on flat and the cat will sit anyway.
For other cats on the site, the Little Miki Cat is a much smaller version with clothes, Cucho the Cat is the smallest of all, and the Castor the Magician Cat shows the same construction at doll size. Everything is listed on the patterns page.
Pattern source: cream and brown kitty pattern by Happy Hook Designs.
For a smaller dressed cat, Lilac Cat is 15 cm in cotton, with a ruffled skirt worked into the front loops.
For a Christmas project in the same joined-legs style, Christmas Bear is a super bulky bear with bobble buttons and a Santa hat.
For a taller cat with no leg seam, Esperanza Cat splits its 36-stitch body into two legs at Rnd 37.


3 comments