
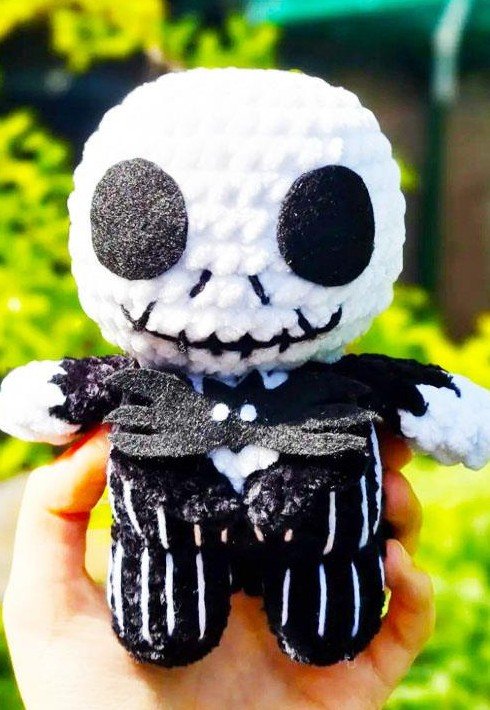
Jack is a 22 cm doll in black and white chenille: a round white head, a black suit with a white shirt front and a spiky jacket hem, thin arms and legs, and two black felt circles for the eye sockets. He is the most graphic amigurumi I have made — the contrast does all the work, so there is almost no embroidery involved.
The construction is unusual in a good way. The legs are made separately and joined with a chain of two, because Jack’s legs are long and thin and the chain gives that gap between them. The white shirt front is crocheted into the black body as colour changes on R10 to R13, and the jacket hem is worked into the back loops left free on R8.
Everything is written out below. The one place where you need to look at your own work is the front hem, which is sewn along the outline of the white stitches — I have described how to find them.
What you need
- Yarn: black and white chenille, size 4 medium — the contrast matters more than the brand
- Hook: 5 mm
- Notions: black and white felt, fabric glue, black and white cotton yarn for the pinstripes, stuffing, tapestry needle, stitch markers
Abbreviations
- MR magic ring, ch chain, sc single crochet, hdc half double crochet, slst slip stitch
- inc increase, dec decrease, BLO back loop only, cc change colour, FO fasten off
- R round
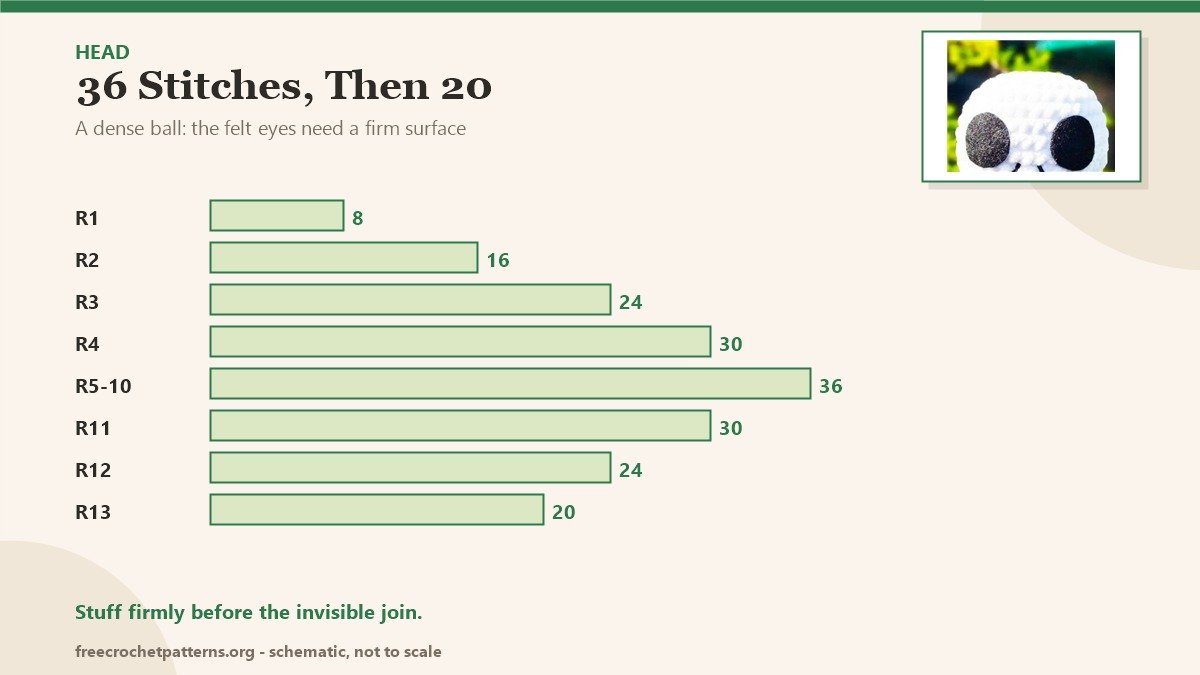
Head (white)
- R1: 8 sc in MR (8)
- R2: 8 inc (16)
- R3: (sc, inc) x8 (24)
- R4: (3 sc, inc) x6 (30)
- R5: (2 sc, inc, 2 sc) x6 (36)
- R6–10: 36 sc (36) — 5 rounds
- R11: (4 sc, dec) x6 (30)
- R12: (3 sc, dec) x6 (24)
- R13: (4 sc, dec) x4 (20)
Cut the yarn and fasten off with an invisible join. Stuff firmly — the head should be a dense ball, not a soft one, or the felt eyes will sit on a dent.
Body, part 1 — the legs
In black. Make two legs; the first is fastened off, the second is joined with a chain.
- R1: 5 sc in MR (5)
- R2: 5 inc (10)
- R3: BLO 10 sc (10)
- R4–5: 10 sc (10) — 2 rounds
Cut and fasten off invisibly. Make the second leg the same way, but this time do not cut the yarn: ch 2.
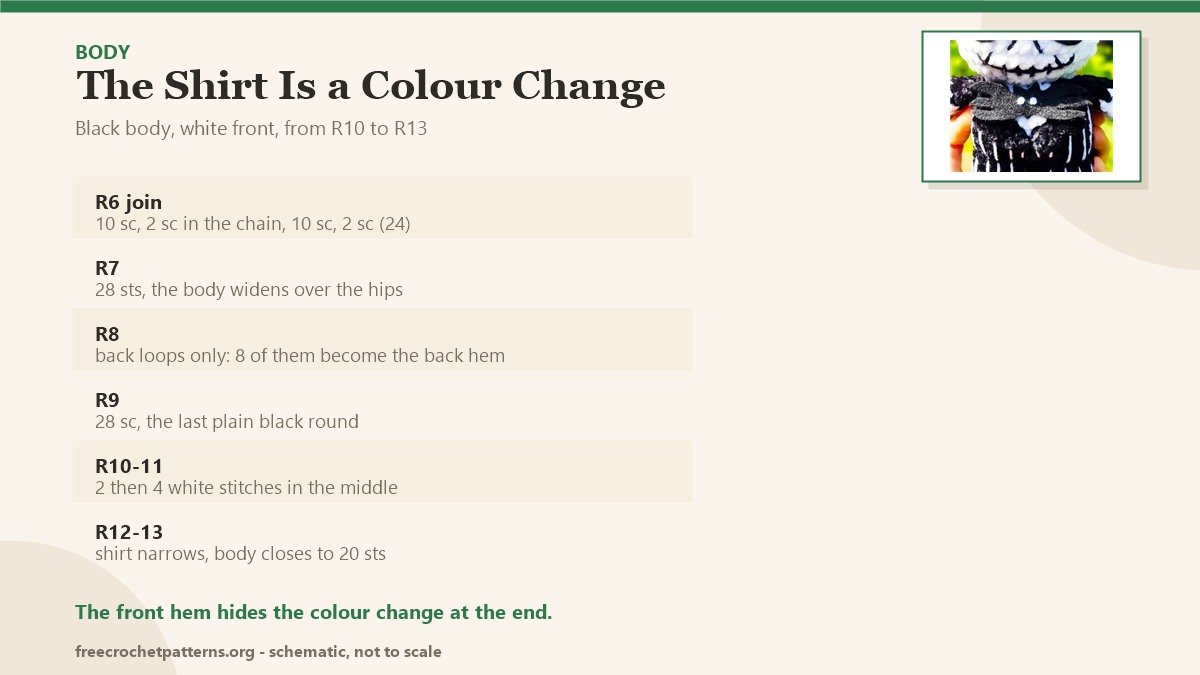
- R6: insert the hook in any stitch of the first leg: 10 sc, 2 sc in the 2-chain, 10 sc, 2 sc in the 2-chain (24)
Body, part 2
- R7: (3 sc, inc) x2, 6 sc, inc, 3 sc, inc, 5 sc (28)
- R8: BLO 28 sc (28)
- R9: 28 sc (28)
- R10: 13 sc, cc to white 2 sc, cc to black 13 sc (28)
- R11: 12 sc, cc to white 4 sc, cc to black 12 sc (28)
- R12: (3 sc, dec) x2, sc, cc to white 2 sc, dec, 2 sc, cc to black, sc, dec, 3 sc, dec, 3 sc (23)
- R13: 4 sc, dec, 3 sc, cc to white sc, dec, 2 sc, cc to black 2 sc, dec, 5 sc (20)
Start stuffing as you go, and keep the feet flat when you stuff them. Finish stuffing, then cut the yarn leaving a long tail.
The colour change does not have to be immaculate: the jacket’s front hem is sewn over that area at the end, which is exactly why the hem exists.
Arms (make 2)
- R1: 4 sc in MR, white (4)
- R2: 4 inc (8)
- R3–5: cc to black, 8 sc (8) — 3 rounds
- R6: fold the arm and close it with 4 sc through both sides (4)
Cut the yarn leaving a long tail. The arms are not stuffed: they are thin on purpose.
Jacket front hem
In black.
- R1: slip knot, ch 6, starting in the second chain from the hook: 1 sc, 1 hdc, ch 2, 1 sc in the back of the second chain from the hook, sc in the next 3 sts
Cut the yarn leaving a long tail. This is the little lapel that sits over the white shirt front.
Jacket back hem
Find the 8 back-loop stitches left free on R8 at the back of the body and mark the first and the last.
- R1: insert the hook in the first BLO stitch, ch 5 (the first chain does not count as a stitch), slst in the second chain from the hook, 2 sc in the next 2 sts
- R2: slst in the next stitch, ch 5, slst in the second chain from the hook, 3 sc in the next 3 sts
- R3: slst in the next stitch, ch 4, slst in the second chain from the hook, 2 sc in the next 2 sts
Repeat R2 and R3 until you have seven spikes, finishing on a short R3 spike. Cut the yarn and fasten off.
Assembly
- Sew the head to the body, adding stuffing as you close the gap.
- Sew the arms to the body at R12–R13.
- Sew the front hem along the outline of the white stitches.
- Sew the back hem spikes so they sit below the white shirt.
- Cut two black felt circles and glue them on R7–R9.
- Sew the pinstripes in white cotton: the legs and the upper body separately.
- Add the bow tie in black and white felt.
The felt eyes are the last thing I do, because they fix the expression. Cut them slightly smaller than you think: on a 22 cm doll, a 12 mm circle already reads as a hollow socket.

Notes
Chenille in black is hard to see under a lamp, so work the body in daylight or use a headlamp — miscounting R12 is the most common way this pattern goes wrong. If you are using a smoother yarn the doll will come out smaller; one hook size up keeps the proportions.
For more Halloween makes, the Plush Pumpkin Kitten and the Mini Pumpkin Man both use the same black-and-orange palette. If you want a doll in clothes, Castor the Magician Cat is the closest relative, and all the patterns are on the patterns page.
Pattern source: Jack Skellington amigurumi, as shared by the original designer on the amigurumi pattern blogs.
If you would rather crochet a cat than a skeleton, Cream and Brown Kitty uses the same dense single crochet and a much friendlier colour scheme.
If you want a stitched face rather than a felt one, Purple Zombie Bunny does the whole character with navy thread.
Another Halloween character built as one piece: One-Eyed Monster, whose head is the top of its body.


2 comments